How To Prep Walls For Painting
How To Prep Walls For Painting

When painting a wall, preparation is key to ensuring a smooth, long-lasting finish. Understanding how to prepare walls for painting the correct way, including how to clean, sand, and repair as necessary, is essential for creating a professional look and feel.
In this guide, we’ll cover everything you need to know when it comes to preparing your wall, including cleaning and sanding walls before painting.
Shop Wall Painting Related Categories


Key takeaways
Preparing your walls for painting is an essential step to ensuring the best results. Preparation includes cleaning, sanding, and potentially priming walls, though different wall types require different levels of preparation.
-
Purpose of Preparation – A professional-looking finish begins with good wall preparation that prevents imperfections, stains, and flaws from showing through the topcoat and damaging the overall look.
-
Sanding – This ensures a smooth, flat surface that can act as a base for the topcoat. It can also eliminate any visible imperfections.
-
Cleaning – Removing dust, grease, and stains is a vital part of the process to make sure flaws don’t appear through the topcoat.
-
Repairing – Cracks and holes must be filled or repaired before painting, as they will show through if left unresolved.
-
Wall Types – Different wall types have different needs. New plaster will require a mist coat before painting, while glossy surfaces will need to be sanded until they are matte to ensure the paint sticks properly. Previously painted walls don’t need primer if the colour you’re going to be using is similar to what’s on there already, but cleaning and light sanding are still advised.
Why is it important to prep walls before painting?
Poor wall preparation can lead to peeling, cracking, or uneven finishes. This can all be prevented with the correct preparation strategies, and a clean, smooth surface is critical to providing the foundation for a durable and long-lasting finish. Painting over dust or grease without cleaning it first will only lead to an unsatisfactory finish.
Learning how to properly prep walls for painting can reduce the need for repainting in the future and will create a far more appealing look for your room.
Tools & materials needed to prep walls for painting
To prepare walls for painting, you’ll need a few tools. Thankfully, these are almost all household objects or basic tools:
-
Sandpaper – This will be used for sanding walls before painting.
-
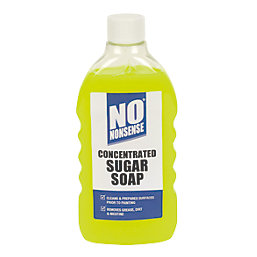
Sugar Soap / Mild Detergent – These are how you’ll clean walls before painting.
-
Filler and Putty Knives – This is for making any necessary repairs.
-
Dust Sheets & Masking Tape – These can create protective barriers to ensure a professional finish.
-
Primer – This helps to create a stable, adhesive, uniform base.
Step-by-step guide: How to prepare walls for painting
Prepping walls for painting the right way will mean the difference between a finish you’re proud of and one that will need repainting in the near future. Follow these steps to make sure you prepare your walls properly:
-
Clear & Protect the Area
-
Clean Walls Before Painting
-
Repair Holes or Cracks
-
Sand Walls Before Painting
-
Apply Primer
Step 1: Clear & protect the area
The first step to prepping your walls for painting is to clear the area of anything that could get in the way or be dirtied by the process. This means moving furniture, covering the floor with dust sheets, and using masking tape along the edges of skirting boards, door frames, and window trims to ensure paint doesn’t get on them once you begin.
Step 2: Clean walls before painting
It’s important to understand how to clean walls before painting in order to set yourself up for success. You’ll need to remove any dust, grease, and stains to begin with. Some of these may be removable with just a cloth, though others may require sugar soap or detergent to lift off the walls.
Make sure to let the walls dry fully before moving on to the next step.
Step 3: Repair holes or cracks
With the walls now clean and dry, you can begin to repair any holes or cracks in the wall. Use your putty knife or scraper to flick loose pieces of paint or flaking plaster away from holes and cracks before applying wall filler well into the holes. Remove any excess and smooth the filler down once done to leave it flush against the wall.
Top Tip: Filler can shrink as it dries, so slightly overfilling and sanding down once it’s dry is often a safer choice than not using enough.
Step 4: Sand walls before painting
Once the filler has fully cured, use a fine-grit sandpaper (120–180 grit) to sand down the wall and ensure the surface is perfectly flat and smooth. Feather the edges around the holes or cracks you filled until the area feels seamless with no noticeable transition line.
Clear any dust with a vacuum and wipe down the wall once finished with a slightly damp cloth.
Step 5: Apply primer
The final step in preparing your walls for painting is priming. Priming is a great way to block stains and guarantee uniform paint absorption.
This step is especially crucial for bare plaster, transitioning between different paint types, or covering dark colours with a lighter shade. If you are painting over an already-painted wall with a similar colour to the one you’ll be using, then primer is not necessary.
Prepping different wall types for painting
Different wall types will vary how best to prep walls for painting, as each wall type has its own unique properties.
-
New Plaster – Bare plaster is extremely porous and will pull moisture out of standard paint, leading to peeling and cracking. To prep these walls for painting, use a watered-down emulsion paint layer as a mist coat to seal the surface.
-
Previously Painted Walls – Ensure these are thoroughly washed before sanding down lightly to smooth away any flaws and old roller textures.
-
Glossy Surfaces – These surfaces can be difficult to stick to for water-based paints, so the key is firmly sanding the wall until the sheen turns completely matte.
-
Damaged or Stained Walls – Cracks and holes must be filled properly, and water or smoke stains should be coated with a layer of stain-blocking primer so they do not show through your topcoat.
Can you just paint over already painted walls?
If the wall is clean and smooth already, and you are using the same kind of paint, then painting over the wall without thorough preparation is fine. However, additional prep is needed when the walls are glossy, damaged, or stained, and proper preparation in the form of a mist coat should always be used when painting new plaster.
Previously painted walls should still be lightly sanded and cleaned to ensure the best results.
Tips for achieving the best finish
To achieve the best results when learning how to prep walls for painting, be sure to take notice of the following top tips:
-
Drying – Always allow for proper drying time between steps.
-
Sanding & Cleaning – For the best possible results, don’t skip the sanding or cleaning stages.
-
Lighting – Work in areas of good lighting where possible to notice any imperfections that will need resolving before the painting begins.
-
Testing – Before full application, test your paints and your primers on a small area of the wall to ensure they are the right fit for you and your home.