
How to Build A Retaining Wall
How to Build A Retaining Wall

Building a retaining wall can be a reasonably easy job for the average DIYer, especially if it is relatively small - anything under 1 metre should be achievable. First, make sure you have the correct tools to hand and there is not a major ground level difference. Walls that are planned to be over a meter can be built as a DIY project, but they require excellent drainage and base preparation. Anything over approximately 1.5 metres should be left to a professional because height has a major impact on how complex a retaining wall becomes. Taller walls require much more structural support. As height increases, you may need reinforcement such as geogrid, professional design input, and in some cases compliance with planning permission or building regulations in the UK.
Shop Retaining Wall Related Categories



Key takeaways
-
Importance - Retaining walls are not just decorative, their main function is to support.
-
Safety - Wear protective gear. Especially safety boots, gloves and eye protection.
-
Top Tip - A well-prepared base is key, make sure this is right from the start.
-
Professional - Walls that are planned to be taller than about 1 metre should be left to a professional.
What is a retaining wall?
A retaining wall is usually built on sloped ground to create level surfaces (such as a terrace or a garden bed) or to support higher ground (for example around a patio or driveway) and its job is to hold back the soil behind it. The structure of the wall must be strong as the weight of the soil can be extremely heavy, which needs to be stopped from moving or collapsing. This is important for both practical and safety reasons, as soil movement can damage gardens, paths, or even buildings.
Retaining wall types
The main types of retaining walls are explained below:
Gravity (Weight Reliant)
Best for: Low to medium-height gardens with gentle slopes
A gravity retaining wall is the most widely used system for residential and garden landscapes. It relies on its own weight to hold back the soil. Because of this it must be heavy and strong enough (using more materials) and is suitable only for low to medium height walls.
Sleeper (Timber / railway sleepers)
Best for: Small, decorative garden projects and low walls
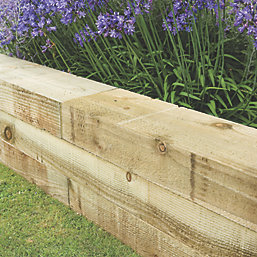
A sleeper retaining wall is a type of retaining wall built using large, horizontal “sleepers” made from timber, concrete, or composite materials. They are commonly used in gardens and outdoor spaces to create raised garden beds, which make planting and maintenance easier while adding a neat, structured look.
Segmental Block (Interlocking)
Best for: Most residential gardens and medium-height walls
Built from concrete blocks that interlock with each other using no mortar, so they are quicker and easier to install than some other types of retaining wall, making them perfect for the DIYer. They are designed to handle drainage well, and are flexible in design (can be built to bend around corners etc) which means they are a good option for gardens.
Cantilever (L-shaped/reinforced)
Best for: Taller walls and heavy-load areas (e.g. near driveways or buildings)
A cantilever retaining wall is designed to hold back soil using reinforced concrete which spreads the load evenly. This type of wall is commonly used for medium to tall retaining structures because it is strong and efficient while using less material than a traditional gravity wall.
Embedded (piled/sheet)
Best for: Tight spaces or soft ground conditions
An embedded retaining wall (piled or sheet pile wall) is a vertical structure designed to hold back soil or water. It extends below ground level for extra strength and stability. Embedded retaining walls are most commonly used in excavations, basements and waterfront projects.
Anchored (tension-supported)
Best for: Very high or heavily loaded retaining situations
An anchored or tension supported retaining wall is a structure that holds back soil using cables or rods (anchors). These anchors are placed under tension deep under the ground behind the wall. They are commonly used in deep excavations or where space is limited.
Tools and materials required to build a retaining wall
As mentioned above, before building a retaining wall yourself, you should gather all the necessary tools and materials ready for the job. A retaining wall is not just decorative, it will be holding a lot of weight, so having the right equipment will ensure the wall is built correctly and stands strong over time.
Tools needed for building a retaining wall:
-
Spade and shovel (for excavation and digging the trench)
-
Rake (for levelling groud)
-
Pickaxe or Mattock (to break through hard soil or rocky ground)
-
Plate compactor/waker plate
-
Rubber mallet/hammer
-
Circular saw (for cutting materials)
For your safety:
Materials needed for building a retaining wall:
-
Wall Units (concrete blocks, timber or stone)
-
Gravel (for base layer)
-
Crushed stone (for backfill and drainage)
-
Perforated drainage pipe
-
Geotextile fabric (to control soil and drainage)
-
Adhesive or mortar (if required for stability)
Before you start building a retaining wall
Before starting construction, make sure all materials and equipment listed above are nearby and ready to use.
Start by planning the wall placement, deciding exactly where the retaining wall will go and how high it needs to be. Use stakes, string lines or spray paint to mark the shape of the wall on the ground. Before any digging begins, check for underground utilities.
The next crucial step for the success of a retaining wall is drainage. Poor drainage is the main reason retaining walls fail. Start by observing how water naturally moves across the area, noting slopes, low spots, and where water tends to collect.
In the UK, you can usually build a retaining wall without planning permission if it’s under 1 metre high near a road or footpath, or 2 metres elsewhere in your garden. However, you may need permission if it’s taller than 2 metres, so it’s best to check with your local authority.
How To Build a Retaining Wall - Step By Step Guide
Building a retaining wall depends on the wall height, soil type, drainage, and whether it must support heavy loads including driveways, slopes and structures. For anything tall or load-bearing, check local regulations and consider an engineer.
Once you have finalised plans for building a retaining wall, follow these steps:
Step 1: Dig and prepare the trench
Using the shovel, dig a trench along the marked layout. The trench should be wider than the retaining blocks to provide room for the gravel base and drainage material. It also needs to be deep enough so part of the first row of blocks sits below ground level, which helps anchor the wall and prevent movement.
As you dig, remove loose soil, roots, and organic material that could settle later. Use the level frequently to check that the bottom of the trench stays even from one end to the other. A level trench is critical because any unevenness in the base will affect every layer above it.
Step 2: Create a compact gravel base
Pour crushed gravel into the trench to form the foundation of the wall. Spread the gravel evenly and compact it in layers using the plate compactor or hand tamper. Compacting the gravel removes air pockets and creates a strong, stable surface capable of supporting the weight of the wall.
Check the gravel base regularly with the level to ensure it remains flat and even. This stage takes patience, but a properly compacted base greatly reduces the chance of settling, leaning, or shifting in the future.
Step 3: Install the drainage
Place the perforated drain pipe behind the wall at the bottom of the trench. The pipe should slope slightly so water can flow toward a safe drainage point. Position the pipe with the perforations facing downward to help collect and redirect groundwater.
Landscape fabric should be placed between the soil and drainage gravel to help stop fine soil particles from clogging the system. Once the pipe is in place, add drainage gravel around it. Proper drainage is essential because trapped water creates pressure behind the wall and can eventually cause cracking or collapse.
Step 4: Add layers
Begin laying the first row of retaining wall blocks directly onto the compacted gravel base. Use the level constantly to ensure every block is perfectly even side-to-side and front-to-back. The rubber mallet can be used to make small adjustments without damaging the blocks.
After completing the first row, place drainage gravel behind the blocks and compact it lightly before starting the next layer. Continue stacking additional rows while staggering the joints between blocks to improve strength and stability. As the wall rises, continue adding and compacting backfill in small sections rather than all at once. Building in layers keeps pressure balanced and helps the wall remain straight and secure.
Step 5: Lay cap blocks
Once the wall reaches its final height, clean the top surface thoroughly to remove dust and loose debris. Apply masonry adhesive if required by the block manufacturer, then carefully position the topper blocks along the top of the wall.
Use the level to check alignment as each topper block is installed. The cap blocks (or topper blocks) give the wall a finished appearance while also helping secure the upper layer beneath them.
Step 6: Backfill behind the wall
As you build the wall, backfill behind it in stages using drainage gravel nearest the blocks and soil further back. Use the wheelbarrow and shovel to place the material gradually, compacting it in layers as you go.
Avoid dumping large amounts of soil behind the wall at once because sudden pressure can push the wall outward. Compacting the backfill properly reduces future settling and helps maintain the wall’s stability.
Step 7: Add topsoil
Spread topsoil across the finished area behind and around the retaining wall. Shape the surface so water naturally drains away from the wall rather than collecting behind it. Good grading helps protect the wall from erosion and water damage over time.
Once the topsoil is in place, the area can be finished with grass, plants, mulch, or decorative stone to complete the landscaping.
Why a properly installed retaining wall is important
A retaining wall is not just a decorative feature, it’s a functional structure designed to hold back a large amount of soil and manage water drainage. It’s important to remember that proper drainage is one of the most crucial steps in building a retaining wall and should never be overlooked. It prevents water buildup behind the wall, which can create pressure and lead to cracking or failure.
Proper retaining wall installation is essential for ensuring the wall remains stable, durable, and safe over time. A correctly installed retaining wall helps reduce the risk of shifting soil, leaning, cracking, or structural failure by using a strong compacted base, proper layering, and most importantly, effective drainage systems.
Common mistakes
The most common mistakes when building a retaining wall are listed below. These issues can lead to movement, leaning, or even structural failure.
-
Providing inadequate drainage
-
Poor base preparation
-
Weak soil compaction
-
Incorrect block placement
-
Failing to use geogrid on taller walls
-
Not staggering joints
-
Improper backfilling.