
How To Wire a Ceiling Light
How to wire a ceiling light
Contents:

Wiring tasks range from simple faceplate swaps for confident DIYers to highly complex projects. While you can safely replace existing switches or sockets after isolating the power, tasks like installing new circuits, working in bathrooms, or upgrading consumer units carry severe safety and legal risks.
Under UK regulations, these complex scenarios require a certified electrician to ensure safety and provide mandatory compliance certification.
Wiring a light fitting is a task that can be done by a confident DIYer, and this guide will break down how to properly prepare to fit a light fitting, how to do the fitting itself, and when it might be time to call an electrician.
Shop Light Related Categories


Key takeaways
-
Identify Your Wiring System – Determine whether your ceiling utilises a standard loop-in system or an older junction box configuration before disconnecting any cables.
-
Match Wire Colours by Function – Connect modern brown live wires to old red ones, modern blue neutral wires to old black ones, and ensure green/yellow earth wires attach to bare copper.
-
Verify the Circuit is Dead – Always use a reliable voltage tester to confirm the power is completely off before touching any exposed wiring.
-
Follow Correct Terminal Order – A standard three-wire loop-in ceiling rose requires strict adherence to the specific loop, neutral, and switch live connection sequence.
-
Know When to Call a Professional – Hire a qualified electrician immediately if your project requires a full house rewire or any modifications to the main fuse board.
Tools and materials you will need
Before you can begin learning how to wire a ceiling light, you first need to have the right tools and materials:
-
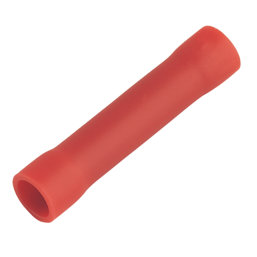
Electrical Cable Connectors – Small plastic clips or blocks used to safely lock wire ends together so electricity can flow between them.
-
Junction Boxes – Protective plastic cases that cover and shield wire connections to prevent shocks, dust, and fires.
-
Twin and Earth Cables – The standard flat grey cables used in homes that contain live, neutral, and safety earth wires inside.
-
Electricians' Screwdrivers – These protect against electric shocks of up to 1,000 volts.
-
Voltage Testers – This allows you to confirm a circuit is dead before working on it.
-
Wire Strippers – Used to remove the plastic coating on wires before joining them to a fixture or terminal.
-
Safety Glasses – Wearing the proper safety equipment will keep you protected.
For a more in-depth list of tools and materials, take a look at our light switch wiring guide here.
How to identify your ceiling light wiring type
To identify your ceiling light wiring type, you’ll need to remove the ceiling rose cover and count the cables. This will allow you to determine whether your wiring is loop-in or junction box wiring. It’s important to understand which it is when wiring a light fitting, as this will impact every step that follows.
Loop-in wiring
To identify loop-in wiring, look out for two or more cables entering the rose. The circuit cable loops from one light to the next, and the switch feed sits on its own terminal.
This is the most common setup in older UK homes.
Junction box (3-plate) wiring
Junction box setups, meanwhile, often have just a single cable entering the ceiling rose, with the loop and switch connections handled at a separate three- or four-terminal junction box elsewhere in the ceiling void.
These are more common in modern homes.
Ceiling light wire colours explained
One of the most important steps in understanding how to wire a ceiling light is to recognise wire colourings.
|
Wire Type |
Live Wire |
Neutral Wire |
Earth Wire |
|
Modern |
Brown |
Blue |
Green & yellow |
|
Older (Pre-2006) |
Red |
Black |
Bare or single-sleeved |
Always match wires by function rather than just colour alone, and use a voltage tester if you’re unsure. There should be no guesswork involved.
For more in-depth information on this, take a look at our wiring colours guide here.
Before you start
Before you can begin to wire your ceiling light, you’ll need to first ensure the power is off. After that, test that the circuit is dead using a voltage tester before photographing the existing wiring. Then, read the fitting instructions.
If the wiring appears damaged or unclear, do not continue with the process.
How to wire a ceiling light: step-by-step
Wiring a light fitting is doable for any confident DIYer, provided you follow each step correctly and safely.
Step 1: Turn off the power and test the circuit
The first step when wiring a light is to turn off the power entirely. Isolate the power at the consumer unit or fuse box, removing the relevant fuse or locking the breaker.
Confirm that the circuit is dead using a voltage tester before touching any wires.
Step 2: Remove the old fitting and note the wiring
The next step is to unscrew the rose cover, making sure to support the old fitting while disconnecting it from the ceiling.
You should note down or photograph which cable sits on which terminal before removing anything, as you may need to reference this later.
Step 3: Connect the wires to your new ceiling light
To wire your light fitting, match the wires by function to one another. Live goes to live, neutral to neutral, and earth to earth.
The terminal order, i.e. the arrangement of the connection blocks, isn’t the same for junction boxes as it is for loop-in setups, so follow the correct sequence for your specific wiring type (see the three-wire loop-in guide below for an example).
Step 4: Secure, test and switch back on
The final step to wiring a light is securing the wires in place and testing the circuit. To do this, tuck the wires into the rose, secure the fitting to the ceiling, and restore the power.
Fittings over about two kilograms need chain support, not just the rose.
Once the power is restored, test the fitting with the switch before fitting the shade or bulb.
How to wire a ceiling light with 3 wires
Wiring a three-terminal loop-in ceiling rose connects your home’s main power loop to the individual lightbulb fitting. It keeps continuous power separated from the wall switch, ensuring your light only turns on when you flip the switch. This setup is standard for most traditional pendant ceiling lights.
To wire a ceiling light with three wires, you’ll need to do the following:
-
Connect Permanent Live: Join the main power feed, the power line going to the next light, and the wire heading down to the wall switch together in the central terminal.
-
Connect Neutral: Join all circuit neutral wires together in the neutral terminal, alongside the neutral wire from the lightbulb cord.
-
Connect Switched Live: Join the wire returning from the wall switch into the remaining empty terminal, and connect the live wire from the lightbulb's cord directly to it.
Follow this loop, neutral, and switch live sequence exactly for a standard three-wire loop-in rose.
How to wire a new ceiling light to old wiring
To wire a light fitting with old wiring, you’ll need to be aware of which colours match. You should always match by function first and foremost, i.e., live to live, neutral to neutral, and earth to earth. In terms of colour, this looks like brown to red, blue to black, and green-yellow to bare earth. Connect these wires using a correctly rated connector block.
When done properly, this is completely safe, though if you want more information on rewiring, take a look at our guide to rewiring a house.
Common mistakes to avoid when wiring a ceiling light
Even once you understand how to wire a light fitting, there are still some common mistakes you should be aware of:
-
Not testing that the circuit is dead before starting;
-
Assuming wire colour instead of function when mixing old and new cable;
-
Overloading a rose’s terminals by looping too many lights through it;
-
Skipping chain support on fittings over roughly two kilograms;
-
Leaving a metal fitting unearthed;
-
Stripping too much or too little insulation before connecting.
When to call an electrician
to call an electrician.
However, you must contact an electrician if any of these situations arise as you begin to work on or observe your wiring:
-
No earth core present at the rose at all;
-
Wiring that looks damaged, perished, or shows signs of scorching;
-
Any work involving a new circuit, extra lighting points, or a bathroom zone;
-
Genuine uncertainty about what's happening at the consumer unit or fuse box.
If any of these scenarios present themselves, calling an electrician is the safest and most sensible decision and is not a sign of any DIY failure on your part.
Additionally, if you’re inexperienced with DIY, you may want to call an electrician to help from the very start to ensure the job can be done properly and safely.
Ready to get started? Shop ceiling lights at Screwfix today.