
How to Skim a Wall: A Step-by-Step Guide
How to Skim a Wall: A Step-by-Step Guide

Skimming a wall means applying a thin finish coat of plaster over existing plasterboard or damaged surfaces. You can successfully achieve a good finish yourself with the right tools and patience.
Set realistic expectations for your first attempt. It'll probably take longer than you think, and the finish won't be perfect. If you get the prep right and work methodically, you'll achieve a clean, paint-ready surface.
Shop Wall Related Categories

Key takeaways
-
Difficulty: Moderate to hard for a first-timer. Timing and trowel technique both take practice, and most first attempts come out slightly uneven with visible trowel lines.
-
Time taken: Around a day of active work (prep, PVA, mixing, two coats, polishing), plus 2–5 days drying time before the mist coat and decorating.
-
Tools needed: Plastering trowel, plasterer's hawk, mixing bucket and paddle mixer, and multi-finish plaster.
-
Top tip: Get the prep right first. A clean, flat, dust-free surface is what stops the skim coat lifting, bubbling, or cracking once applied, more than any technique used during application itself.
What is plaster skimming?
Skimming is the application of a 2–3mm finishing plaster coat over existing walls, ceilings, or fresh plasterboard.
It covers minor imperfections, cracks, and joints. This leaves a flat, seamless surface ready for painting or wallpapering.
Tools required to skim a wall
It’s important to assemble your tools and materials before you start. Skimming plaster sets fast, and you can't stop mid-wall to find what you need.
Tools
-
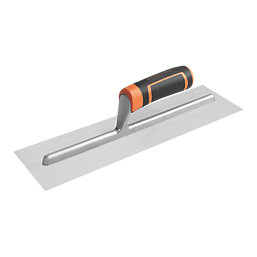
Plastering trowel — clean, flexible stainless steel for laying on and flattening plaster.
-
Plasterer's hawk — flat board with handle for holding wet plaster while working.
-
Plasterer's float — for smoothing initial coats and working around edges.
-
Bucket trowel — for scooping wet mix cleanly onto the hawk.
-
Mixing bucket and paddle mixer — for mixing a lump-free batch quickly.
-
Water spray bottle — for misting setting plaster during final passes to smooth out ridges.
-
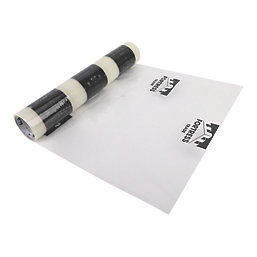
Dust sheets — to protect floors and surrounding fixtures from wet spills.
Materials
-
Multi-finish plaster — standard finishing plaster for most internal wall surfaces.
-
PVA bonding agent — diluted and applied to seal porous walls and control suction.
-
Angle beads — metal or plastic mesh beads for sharp, straight external corners.
Choosing the right plaster for skimming
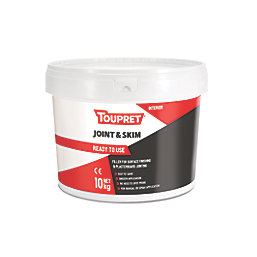
Once you’ve got the right plastering tools, you can choose between powder-based multi-finish plaster and ready-mixed skim coat products.
For standard DIY skimming, powder-based multi-finish plaster (e.g., Thistle Multi-Finish) is the trade's go-to choice. Mix with water using a power paddle to a smooth, lump-free consistency. Wear a dust mask and gloves when mixing, and ventilate the room. It sets quickly, so you have a limited working window to lay two coats and flatten them.
Ready-mixed skim- coat products come pre-blended and air-dry rather than setting chemically. They have a longer working time and are better suited to small touch-ups, as the ridges can be lightly sanded back. But they typically cost more per m² than powder plaster, shrink slightly as they dry, and produce a softer finish.
The recommendation is straightforward. Powder-based multi-finish for full walls and entire rooms. Use ready-mix only for minor repairs and small patching jobs where convenience outweighs cost.
Do you need to PVA before skimming?
PVA before plastering is essential when skimming over existing porous plaster or painted walls. Without it, dry surfaces suck moisture out of wet plaster too fast, causing it to crack and fail to bond. Dilute PVA with water at a 1:4 ratio and apply two coats. Let the first dry completely, then apply the second and wait until it's tacky, like sticky tape, before plastering. Timing is critical: plaster onto wet PVA, and the coat slides off; let it dry completely, and you lose the key needed for adhesion.
Plasterboard is the exception. Standard unpainted plasterboard doesn't need PVA — its paper face absorbs moisture at a controlled rate by design. Applying PVA to fresh plasterboard causes the plaster to slide and delays setting time. Old, damaged, or previously painted plasterboard is different: it does need a PVA coat or dedicated bonding agent to secure a reliable bond.
How to skim a wall: step by step
Follow these six steps for a smooth, paint-ready finish. Work quickly — multi-finish plaster sets fast.
Step 1: Prepare the surface
Scrape away peeling paint, remove wallpaper, and brush off all loose dust and grime.
If the property was built before the 1990s, check for lead paint before dry-scraping or wet-scraping. If you’re unsure, get professional advice before you begin.
Fill deep cracks, gouges, and old fixing holes with a suitable filler and sand flush. A solid, clean, flat surface is what stops the skim coat lifting, bubbling, or cracking once applied. For detailed advice on repairing wall damage first, see our guide on filling holes in walls.
Step 2: Apply PVA
Mix one part PVA with four parts water and brush or roll it across the entire surface. Let the first coat dry completely, then apply a second coat and wait until it's tacky, like sticky tape, before plastering. That tacky layer is what locks the skim coat in place and stops the wall drawing moisture out of the plaster too fast.
Step 3: Mix the plaster
Always add plaster powder to clean cold water, never the other way around. Pouring water into powder creates stubborn lumps at the bottom that won't mix out. Wear a dust mask when adding the powder, and mix in a well-ventilated space. Use a paddle drill attachment and mix until you reach a smooth, thick-cream consistency with no lumps. Work in small batches; mix only what you can apply before it starts to set in the bucket.
Step 4: Apply the first coat
Load a strip of plaster along the edge of the trowel from the hawk.
Hold the trowel at a 10–15 degree angle against the wall and sweep smoothly upward from a bottom corner. Work in overlapping sections to lay a uniform 2–3mm layer across the surface. Keep firm, steady pressure throughout — dragging or uneven pressure leaves deep ridges that are hard to flatten later.
Step 5: Apply the second coat
The wait for the first coat to firm up and darken can depend on room conditions, e.g., ambient temperature, humidity, and substrate absorbency. Check the manufacturer guidelines to see how long you should wait to apply the second coat.
Mix a slightly thinner batch and sweep on a light 1–2mm second coat. This fills minor hollows, covers trowel marks, and blends into the tacky first layer for a smooth, even finish.
Step 6: Polish the finish
As the plaster hardens and turns a dark pinkish shade, mist the wall lightly with water and sweep a clean flat trowel across the surface to polish out remaining lines and bumps. Leave to dry completely until it turns a uniform light pink; check the manufacturer guidelines to see how long this is. Before decorating, apply a diluted mist coat of emulsion to seal the fresh, porous surface and ensure topcoats adhere properly without peeling.
Common mistakes when skimming a wall
Avoid these five mistakes and you'll get a smooth, even, crack-free finish.
-
Using skim coat as a filler — skimming plaster is a finishing layer, not a structural repair product. Fill deep cracks and gouges with a rapid-setting filler and sand flush before any skim coat goes on. Applying plaster over deep holes causes it to slump, sag, and crack as it dries.
-
Skimming over textured coatings without testing for asbestos — textured coatings like Artex in properties built or decorated before 2000 may contain asbestos fibres. Disturbing or sanding these during prep is a serious health hazard. Never assume a wall is safe based on age alone. Have it tested by a UKAS-accredited asbestos surveyor, or seal it with a specialist encapsulating barrier-bonding agent instead of removing it.
-
Working in extreme temperatures — plaster sets through a chemical reaction. Hot rooms, cold drafts, or heaters blowing directly on the wall cause premature drying, cracking, and poor adhesion. Keep the room at a stable 15–20°C with windows closed while applying coats.
-
Mixing too much plaster at once — multi-finish gives you a working window of 30–45 minutes before it stiffens beyond use. Mix small, manageable batches — enough to cover one wall or section at a time.
-
Misjudging the timing for the second coat — too early and the trowel drags and tears the base coat away from the wall. Wait until the first coat has darkened and turned tacky — roughly 15–20 minutes — before applying the second layer.
Is skimming a wall a good DIY job?
Skimming a wall is doable as a DIY job, but go in with realistic expectations. It's one of the harder trade skills to pick up because timing and trowel technique both take practice, and there's no way to learn either from reading alone. Most first attempts come out slightly uneven, with visible trowel lines or a few thin spots that need a light sand once dry. That's normal, not a sign you've done it wrong.
The trade-off comes down to scale and stakes. A full room, a ceiling, or anywhere you'll be looking at the finish every day (a hallway, a living room) is worth handing to a plasterer if you want a flawless result first time. But a single wall, a small repair, or a space you don't mind practising on is a reasonable place to start. Skimming plasterboard is more forgiving than working over old plaster, so it's a better place to build confidence before tackling a full room.
If you decide to give it a go, start small: pick a low-visibility wall, use plasterboard rather than old plaster if you can, and give yourself a full day with no other jobs competing for your attention. For the full step-by-step, see our guide on how to plaster a wall.