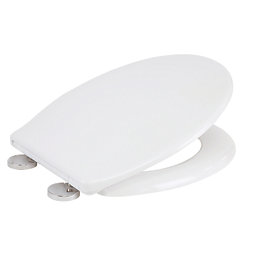
How to Tighten a Toilet Seat
How to Tighten a Toilet Seat

A loose toilet seat is a common household problem, but it's usually quick and easy to fix.
In this guide, we’ll walk through how to tighten a toilet seat using basic tools and will be sure to cover different toilet fixings – including toilet seats with concealed fixings.
Shop Toilet Related Categories


Key takeaways
Tightening a toilet seat is a simple DIY task regardless of your experience level and uses only basic tools. However, there are some key things you need to know before beginning:
-
Common Causes of a Loose Toilet Seat: Toilet seats loosen due to worn fixings, incorrect installation, or frequent movement.
-
Choose the Right Fixing Type: Identification is key before starting, as toilets use bottom fixings, top fixings, or concealed fixings.
-
Follow The Simple 5-Step Process: Fix the seat in 10–20 minutes using basic tools by identifying the fixing type, accessing the bolts, aligning the seat, carefully tightening the screws clockwise, and testing for stability.
-
Troubleshooting: If screws spin, pull up while turning to create tension; if sliding continues, add rubber washers; and if the seat still wobbles after tightening, the hinges are likely worn and the seat requires replacement.
Why is your toilet seat loose?
A loose toilet seat can be caused in a number of ways:
-
Worn Toilet Fixings – Worn, loose, or damaged toilet fixings at the back of the bowl are a common cause of loose toilet seats.
-
Incorrect Installation – If the seat was improperly installed, it may be loose-fitting.
-
Frequent Movement – Too much movement on the toilet seat can cause the fasteners to loosen.
If the issue happens only every few months or so, then tightening the toilet seat will be sufficient – more frequent than that and it may require replacement parts.
Types of toilet seat fixings explained
When it comes to toilet seat fixings, there are a few different types. It’s important to identify which type you have before beginning your repair:
-
Bottom Fixings – Involves feeding a bolt through the pan and securing it with a nut from underneath, making it ideal for traditional toilets with accessible backs.
-
Top Fixings – Uses an expanding plug or toggle inserted from above, which is designed specifically for modern toilets where you cannot reach the underside of the porcelain.
-
Concealed Fixings – Utilises decorative covers to hide the mounting hardware and often features a quick-release button that allows the seat to be easily popped off for cleaning.
What you’ll need to tighten a toilet seat
To tighten a toilet seat requires only a few basic tools and is a simple DIY job. You’ll need the following hand tools and materials:
-
Screwdriver
-
Adjustable spanner
-
Replacement toilet fixings
If your seat shifts, slides, or creaks even after tightening it, or the fixings and bolts are visibly worn and rusty, that is when you’ll need replacement fixings rather than a simple tightening job.
Step-by-step guide to tightening a toilet seat
Tightening a toilet seat can be done in five simple steps:
-
Identify Fixing Type: Check what kind of fixings your toilet seat uses. This determines whether you will work entirely from the top or reach underneath the porcelain.
-
Access the Bolts: Use a flat-head screwdriver to pry open the decorative hinge covers or press the quick-release button to remove the seat. This reveals the screw heads so you can begin the adjustment.
-
Align the Seat: Close the seat and align it so that it sits straight. Holding it in this position prevents the seat from shifting while you apply pressure.
-
Tighten the Fixings: Turn the screws clockwise until they are snug and the seat no longer moves. Avoid overtightening, as too much force can crack the porcelain.
-
Finish and Test: Snap the hinge covers back into place and give the seat a firm side-to-side jiggle. If it remains solid, your repair is complete and the seat is ready for use.
How to tighten a toilet seat from underneath (Bottom Fixings)
Many of the steps to tightening a toilet seat are the same regardless of fixing type, but the difference lies in how to access the bolts that need tightening.
For toilet seats with bottom fixings, the first thing you’ll need to do is expose the bolts by flipping open the plastic hinge covers on the toilet seat. Then you’ll need to reach underneath the back of the porcelain bowl to find the nuts threaded onto the bolts.
After that, simply align the seat, tighten the bolt while holding the nut underneath with pliers or your hand, and jiggle the seat to test it out.
How to tighten a toilet seat with concealed fixings
To tighten toilet seats with concealed fixings, you need to first remove the toilet seat. Locate the mechanism at the back of the seat, where it connects to the hinges. You should find one or two metal buttons that can be pressed to lift the seat off the mounting posts.
With the seat removed, you’ll notice metal or plastic caps covering the hinges. Pop these off with your fingers or a screwdriver to reveal the screws beneath. Next, simply tighten and reassemble.
Top Tip: If the screw just spins without tightening, you may need to pull the bolt up slightly while turning. This will create enough tension for the fixing underneath to grip the porcelain.
Common problems when tightening a toilet seat
Though it is a simple DIY job, there are some common problems that can come with tightening a toilet seat:
-
Spinning Bolts – If the screws turn but don’t tighten, it means the expansion plug or toggle has lost its grip. Pull the bolt up while turning to fix this.
-
Sideways Sliding – If your seat is prone to sliding sideways, installing rubber washers or a non-slip tightening kit between the hinge and toilet bowl will create the necessary grip.
-
Loose Hinges & Worn Joints – If the mounting posts are tight but the seat continues to wobble, it may mean the hinge mechanism or joints are worn or snapped. In this case, a replacement seat is needed.
-
Unstable Base – If the porcelain base itself wobbles, then the issue is not the toilet seat but a problem with the floor fixings instead. For fixing issues of this kind, a plumber may be best suited to fit the toilet properly.
When to replace toilet seat fixings or the seat
In most cases, a simple tightening of the bolts and screws is enough to fix any toilet seat issues, but it’s important to know when this won’t work and further action is needed.
If the mounting posts are tightened but the toilet seat still wobbles, indicating a worn or broken hinge or joint, then the seat will need replacing.
If the fixings are worn or rusted, you’ll be able to make a repair replacing only the fixings, not the entire toilet seat. Any visible damage to the fixings or seat should also warrant a replacement.