How To Fit A Toilet
How To Fit A Toilet

Before you begin, it’s a good idea to understand the process fully. A poorly installed toilet can cause significant issues, and most households can’t afford for it to be out of action for long (especially if it’s the only one).
So, how difficult is fitting a toilet? If you’re confident using tools and have the right safety equipment, you should have no problem fitting a toilet yourself. But if you’re unsure, we recommend calling an experienced plumber (choose one registered with the CIPHE). A correctly fitted toilet uses water more efficiently, is less likely to leak and looks better. If you need help not only with knowing how to fit a toilet (or how to replace a toilet) but also with understanding how a toilet works, make sure you do your research before you get started. It’ll make the process of fitting a toilet a lot quicker and easier.
Before you get started, make sure you check whether you need building regs approval. There’s normally nothing to worry about if you’re just swapping out an old toilet for a new one. But if you’re adding a new cloakroom or bathroom, you’ll need building control approval for the plumbing (and electrical) work. There are minimum standards on accessibility and ventilation, too.
Shop Toilet Related Categories


Tools and materials needed to fit a toilet
Nobody knows how to fit a toilet (or how to replace a toilet) without learning the steps involved. Like any DIY job, fitting a toilet is a lot easier if you get everything organised before you start.
Apart from the toilet pan and cistern, these are some of the tools and materials you’ll need:
-
Adjustable wrench – for tightening fastenings in small spaces (like behind the toilet).
-
Spirit level – to make sure you’ve got the toilet completely level.
-
Electric drill – for drilling mounting holes or installing brackets.
-
Waterpump pliers – for attaching the supply line and adjusting other fittings.
-
Screwdriver – for securing the cistern to the bowl and fitting the flush handle or button.
-
Sanitary sealant and sealant gun – for sealing the base and waterproofing joints.
-
Toilet pan connector – to connect the waste outlet with the soil pipe.
-
Safety gloves and goggles – to protect your eyes and hands when you’re using power tools.
- Bucket and sponges/cloths – for cleaning.
How to remove a toilet step by step
Before you can get started with fitting a toilet, you’ve probably got an old one to remove. Here’s how to get your old toilet out easily, and dispose of it properly.
Step 1. Turn off the water supply to your toilet
Before you get going, find the water supply valve and turn it off. That means no water will be able to come into the toilet while you’re working on it, reducing the risk of spills or leaks.
Step 2. Empty the cistern and toilet bowl
Flush the toilet to empty most of the water from the toilet bowl (and cistern), then soak up any water left in the toilet or cistern with a sponge. You can also use a wet vac. A dry toilet is easier to remove and dispose of, and a dry work area will make fitting the new toilet easier (and a lot more pleasant).
Step 3. Disconnect the water supply pipe
Next, disconnect the pipe that supplies water to the cistern. Make sure you have a towel close at hand to mop up any drips.
Step 4. Remove the cistern
Remove the cistern, if it's separate from the toilet base. Firstly, take off the cistern lid, which isn’t usually fixed on. Then unscrew the nuts at the base of the cistern, so you can lift it off and put it to one side.
Step 5. Loosen the toilet bolts and remove the toilet base
Grab your wrench and carefully loosen the bolts at the base of the toilet that attach it to the floor. (If they’re difficult to remove, apply some WD-40). If the base is attached to the floor with silicone or caulk, use a putty knife or utility knife to cut through it. Once you’re done, lift up the toilet and put it out of the way.
Before you go any further, you’ll probably want to put a cloth over the drain at this point, to stop nasty odours escaping. The next step is to make sure the whole area is clean, dry and free from dirt or residue.
Step 6. Dispose of or recycle the old toilet
Check the best way to dispose of or recycle your toilet in your area. If you do this before you remove it, you won’t have to store it while you work out what to do with it.
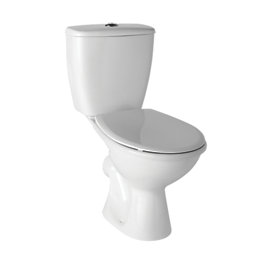
How to fit a close-coupled toilet step by step
Close-coupled toilets, which combine the cistern and bowl in a single unit, are the most common type of toilet in the UK, mainly because they’re compact. Here’s a general guide to how to fit a close-coupled toilet (including fitting a toilet waste pipe). Always read the manufacturer’s guidance on your specific toilet, as instructions may vary between models.
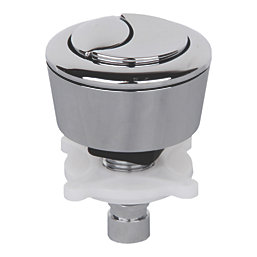
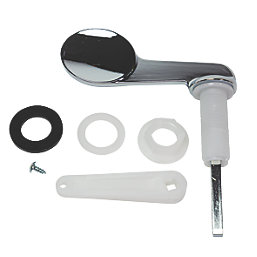
Step 1. Assemble the flush mechanism
Your new toilet probably comes with a toilet flush button rather than a lever. Dual flush buttons can help reduce your water bills by using less water. Put your flush mechanism together according to the manufacturer’s instructions. Don’t over-tighten anything, as it can damage parts.
Step 2. Attach the cistern to the pan
Place the cistern on top of the pan (the lower part of the toilet) and line up the bolt holes. Use the bolts that came with your toilet to fix the cistern to the pan. Making sure they’re evenly tightened will help prevent leaks. Before you move on, check the seals and gaskets are properly aligned too. Again, this will help prevent leaks.
Step 3. Position the toilet
Position the toilet over the flange (the bracket that connects the toilet to the floor). Check that it’s level from back to front and side to side.
Step 4. Fix the cistern to the wall
If necessary, mark and drill pilot holes into the wall, then use the fixings provided or suitable wall plugs and screws to secure the cistern in place. This helps prevent movement and reduces strain on the flush pipe connections. Be careful not to overtighten, as this can crack the ceramic.
Step 5. Fix the toilet to the floor
Position the toilet and check that it’s aligned with the soil pipe in the wall, and level from back to front and side to side. Once you’re happy, screw the toilet base to the floor, taking care not to over tighten the screws.
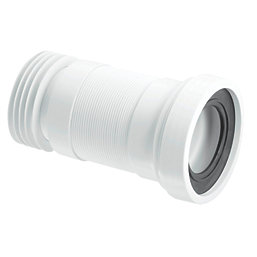
Step 6. Attach the toilet waste pipe
Fitting a toilet waste pipe (commonly called a pan connector) properly is vital to avoid leaks and odours. Fit the pan connector securely onto your toilet’s outlet, then connect it securely onto the toilet pipe. Use a flexible pan connector if the two don’t line up exactly.
Step 7. Connect the water supply
Connect the water supply pipe to the fill valve on the cistern, then turn on the water supply and check there are no leaks. Then double-check all your connections again, and tighten up any that seem loose.
Step 8. Fit the toilet seat
Install the toilet seat by lining up the mounting holes on the seat and toilet bowl. Secure the seat in place, making sure it stays in the right position while you’re working on it. Finally, check that the seat opens and closes smoothly.
Step 9. Test for leaks and adjust as needed
Flush the toilet a few times, and check for small drips and obvious leaks. If you notice a problem, adjust the relevant connections or bolts.
Step 10. Seal around the base of the toilet
Load up your silicone gun, then seal around the base of the toilet where it meets the floor. This helps create a waterproof barrier and stops the toilet moving. Smooth the sanitary sealant with a tool or finger for a clean finish, and leave it to cure as per the manufacturer instructions.
Step 11. Do a final flush test
If you’ve followed the steps correctly you shouldn’t have any leaks, but do carry out a final flush test. Fill the cistern and flush, just to make sure your toilet’s ready for use.
Different types of toilet installations
Close coupled toilets are common, but there are other types too, including back-to-wall, wall-hung and high-cistern toilets. Different types of toilet suit different styles and bathrooms. These days, our interest in all things décor and interiors doesn’t stop at the bathroom door. We don’t just want our toilets to work properly and feel comfortable, some of us want them to make a style statement, too.
- Back-to-wall toilets: Want a sleek, modern look? With a back-to-wall toilet, the cistern is concealed in a wall or furniture unit, creating a clean and space-saving finish. Of course, back-to-wall toilets are a bit more work to install, because you need to hide the cistern and make the flush accessible with a flush plate or concealed button. You’ll need to do extra research on how to fit a toilet of this type, but they do elevate your bathroom, and they’re great for small spaces, where you don’t want the toilet to dominate.
- Wall-hung toilets (which are attached to the wall, not the floor): Wall-hung toilets are becoming more fashionable in the UK. They look smart and minimal (because the plumbing’s hidden in the wall), use around 20% less water and are easy to clean around. They’re more challenging to fit, though. You’ll need a sturdy frame within the wall to support the weight, and a concealed cistern. But the final result is worth the effort.
-
High-cistern toilets: For a really classic look that compliments period-style bathrooms, a high-cistern toilet could be the right choice for you. The cistern is mounted high up on the wall, and it’s connected to the pan by a long flush pipe. To install one of these you’ll need wall space for mounting the cistern securely, and to follow specific instructions for this type of toilet.
Common mistakes to avoid when fitting a toilet
We all make mistakes. But prevention beats cure every time, so here’s a list of the most common mistakes people make when fitting a toilet.
-
Over-tightening the fixings – this can crack the porcelain and cause leaks.
-
Misaligning the pan with the waste pipe.
-
Not using the right pan connector – for example, not using a flexible one when the toilet bowl and soil pipe aren’t perfectly aligned. When you’re fitting a toilet waste pipe, it’s important to choose the right one. If you get it wrong, you could end up with leaks and odours.
-
Installing your toilet on a surface that isn’t level – the toilet will wobble and be unstable.
-
Not creating a proper seal around the base of the toilet, so that water or odours escape (it can also make the toilet wobble).
Key takeaways of how to fit a toilet
Hopefully you’ve learned everything you need to about how to fit a toilet, and that fitting a toilet yourself is possible. It doesn’t matter whether you’re fitting a toilet just because you fancy a new style, or you’re looking for guidance on how to replace a toilet because yours has broken: our number one tip is to go slowly and triple-check everything before you move on to the next stage. Look for leaks as you go, take your time, invest in quality equipment and avoid over-tightening fixings and fastenings.
Choose the right type of toilet for your needs, and remember, you don’t have to go with the classic close-coupled toilet. There are lots of other toilets that do the job and might work better with your space. Now you know how to fit a toilet, you might feel confident enough to go for a different look, or a more water-efficient style.
Whichever toilet you go for, the best result after fitting a toilet is that you don’t have to think about it again. A great toilet installation job means you take having a properly functioning, leak-free and comfortable toilet for granted. It takes a bit of effort to get that result, but it’s completely possible.