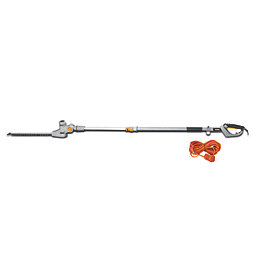
How to Sharpen Hedge Trimmer Blades
How to Sharpen Hedge Trimmer Blades

Shop Hedge Trimmer Related Categories


Having sharp hedge trimmer blades is important for protecting your plants against disease. It’s also important for keeping yourself safe while using the tool. Dull blades tear through branches instead of slicing cleanly through them. This leaves behind jagged edges which can invite diseases into your plants. Sharpening your hedge trimmer is a cost-effective way to ensure you can continue trimming your greenery without spending money on a new trimmer.
This guide will give you simple, step-by-step instructions on how to sharpen hedge trimmer blades.
Key Takeaways
-
Identify Dullness Early: Sharpen blades every 50 hours of use or if you notice branches snagging, ragged leaf edges with brown tips, or the motor struggling against increased resistance.
-
Prioritise Safety and Prep: Always disconnect the power source (battery, plug, or spark plug) and wear rigger gloves before cleaning blades with resin solvent to remove sap that would otherwise clog your sharpening tools.
-
Use Manual Filing Techniques: Secure the bar in a vice and use a flat mill file at a 30 to 45 degree angle; only use forward strokes, and count the number of passes per tooth to ensure the blade remains symmetrical and balanced.
-
Finish and Lubricate: After filing, remove metal "burrs" by running a whetstone or file flat against the underside of the teeth, then wipe away metal dust and apply machine oil to prevent rust and friction.
Signs For Blade Maintenance & Frequency Of Sharpening
Hedge trimmers should be sharpened roughly every 50 hours of use. This is so they can continue to cut cleanly through branches without any resistance. Below is a list of signs that the blades in your hedge trimmer may need to be sharpened:
-
Branches snagging – If the trimmer begins to pull or jam on branches that it used to slice through easily, the cutting edges are becoming dull.
-
Ragged or uneven cuts – Dull blades crush plant fibres rather than cutting them. This results in frayed leaf edges that quickly turn into unsightly brown tips.
Engine/motor struggling – If the engine or motor sounds like it is vibrating more than usual or stalling out mid-cut, it is likely fighting the resistance of dull metal blades.
Tools And Equipment You Will Need
Below is a list of the hand tools and equipment needed to sharpen hedge trimmer blades.
-
Flat mill file - This is a type of metal file. It’s used to sharpen the bevelled edge of each tooth.
-
Whetstone – Used for smoothing or "honing" the flat underside of the metal. This helps to snap off the burr (thin material left behind on metal after machining, drilling or cutting), which ensures a razor-sharp, snag-free finish.
-
Resin Solvent – Removes sticky sap and debris so the file can reach the metal.
-
Stiff Wire Brush - Scrubs away dried-on dirt and plant matter before you begin.
-
Machine Oil – Lubricates the blades after sharpening to prevent rust and friction.
-
Bench vice – Essential for safety. It holds the trimmer bar rock-steady so you can use both hands on the file for a consistent angle.
-
Soft cloth – Used to clean the blades before filing and remove grinding dust.
-
Wooden Blocks – To place in the vice jaws if you need to protect the finish of the trimmer bar from being scratched by the metal vice.
Safety Precautions Before You Start
Before you sharpen your hedge trimmer blades, you must do the following:
-
Unplug the trimmer from the power outlet (if it is a corded trimmer)
-
Remove the battery from the trimmer (if it is battery operated)
-
Disconnect the spark plug wire (if it is a petrol powered trimmer)
-
Put on rigger gloves
-
Put on safety glasses
Even when the tool is switched off/disconnected from its power source, you should still wear rigger gloves, as dull blades can still cut you.
How To Sharpen Hedge Trimmer Blades: Step-By-Step
Sharpening your hedge trimmer by hand is the superior method for maintaining a precision edge while protecting the tool's longevity. By using a manual flat file, you maintain total control over the process and avoid the high-speed friction of power grinders, which can overheat the metal and ruin its temper.
Ensure that you’ve organised your hand tools and materials before you start.
Step 1: Cleaning the blades
Use a stiff wire brush and a resin solvent to strip away any dried sap and debris. This is a key point, as you will not be able to file through sap. The resin will clog your file and ruin the sharpening angle. A clean blade ensures the file grips the metal properly rather than sliding over slick residue.
Step 2: Securing the trimmer
Holding a hedge trimmer by hand while filing the blades is dangerous.
It also makes it very difficult to maintain a consistent sharpening angle. Instead, clamp the blade bar securely in a sturdy bench vice. You can use wooden blocks or rubber jaw pads if necessary to protect the metal.
To achieve a precision edge, you must ensure the tool remains completely still.
Be careful to support the main body of the trimmer on your workbench. If the heavy motor or battery housing is left hanging, the bar may twist or bend under the pressure of your file, leading to an uneven and ineffective edge.
Step 3: Sharpening techniques
To achieve a professional-grade edge, you must align your metal file with the existing factory bevel of the tooth, which is typically set at an angle between 30° and 45°.
Maintaining this angle range is vital. If you file too steeply, the edge will be blunt, and if you file too shallowly, the edge will be thin and prone to chipping.
Focus on one tooth at a time, positioning your file so it sits perfectly flush against that slanted cutting surface before you apply any pressure.
You should only file in a forward stroke, pushing the file down and away from your body across the metal. Dragging the file backward across the tooth can dull the file’s teeth and create a ragged edge on your blade. Instead, apply firm, even pressure on the push, then lift the file completely off the metal as you bring it back to the starting position for the next stroke.
To ensure the blades remain symmetrical and the motor doesn't vibrate excessively, you should count your strokes for every single tooth—for example, five firm passes per edge. By applying the exact same number of strokes to every tooth across the entire length of the bar, you ensure that the metal is removed evenly. This helps to keep the blade's weight and cutting capacity consistent.
Step 4: Post-sharpening care
After you’ve sharpened the cutting edges, you must address the underside of the teeth. This is where tiny, jagged metal curls, known as burrs, can form.
Flip the trimmer over and lightly run your file perfectly flat across the back of the blades. This snaps off the filings to ensure the upper and lower blades can slide past each other without catching.
Finally, use a clean rag to thoroughly wipe away any leftover metal dust, then apply a generous coat of lubricant or a specialised resin remover spray such as WD-40. This final step is essential to seal the freshly exposed metal against rust and guarantee the blades glide with minimal friction during your next gardening session.
Sharpening vs. Replacing Hedge Trimmer Blades
When deciding whether to sharpen your hedge trimmer or invest in a replacement, you should use the condition of the metal as the deciding factor. If you notice that the blades are cracked, severely bent, or have missing teeth, sharpening is no longer a safe or effective option. You will need to purchase a replacement. Fortunately, there are multiple options available for under £125. However, if you are looking for something more high-performance, then premium trimmers are also available.
If you attempt to grind down a damaged blade with a power tool, e.g., a Dremel, it can be a serious safety risk to you or anyone else who operates it. This is because Dremels can quickly grind through the abrasion limit of the blades (5 mm for most manufacturers). This causes the blades to become brittle and potentially snap off during use.
If you decide to use a power tool to sharpen the blades, you must use it in very short bursts. This will help to preserve the integrity of the metal.