How to Box in Pipes
How to Box in Pipes

Boxing in pipes can help to create clean lines in your home by hiding away plumbing work in different rooms. It can also create a safer space for children and pets for when the pipes get hot, and can provide noise reduction and even create focal areas for storage.
In this article, we’ll look at the benefits and key safety aspects of pipe boxing, with a step-by-step guide for how to box in pipes yourself. Basic boxing is a manageable DIY job for most homeowners, but we’ll also cover how to box in vertical pipes, the tools you’ll need, and whether to insulate the pipes first if you wish to boost energy efficiency in your home.
Shop Pipe Related Categories


What Does Boxing In Pipes Mean?
Boxing in pipes means covering exposed pipe work with a wood or plastic covering, which you can build or buy pre-made, leaving a seamless aesthetic. It also helps protect building users from potentially hot pipes, makes cleaning easier, lowers the condensation risk in bathrooms, reduces pipe noise, and even creates a practical storage space in small rooms. If you also wish to improve energy efficiency, it's possible to insulate the pipes before boxing them in to avoid losing heat.
Plywood Ranges For Boxing In Pipes
You can build your own panels to box in your pipes using plywood sheet materials, or buy pre-made boxing. Plywood is made from engineered wood veneers, fixed together in layers, and is great for boxing in pipes in most rooms as it’s lightweight, easy to cut, and can be painted afterwards to match the room décor. It comes in different thicknesses, can be used in L-shapes or U-shaped designs, and some can be made from recycled materials or even pre-finished to save time painting.
Typically, low traffic areas in dry spaces require 5mm thick plywood boards. For higher traffic areas, or if you’d like to use the boxing for shelving or storage, it’s recommended to use thicker plywood (such as 8mm). You’ll need to accurately calculate the amount you’ll need for the task before you order (length and depth), adding on a little for wastage. If it’s for a bathroom, shower room, or a room which gets damp, it’s better to use plastic, moisture-resistant MDF, or aluminium instead of plywood.
Tools and Materials Required To Box In Pipes
Before you start, it’s important to work out the materials you’ll need for the space you’re working in. Plywood is a common material used for boxing, but bathrooms will need a material that won’t warp. Here’s what you’ll need before you get started:
-
A metal tape measure or laser measurer.
-
Pre-made pipe covers or plywood/timber sheets to cover the pipes.
-
Wooden battens to create the frame.
-
Spirit level.
-
Pencil to mark out the space and drilling holes.
-
A wire detector, to avoid existing cables.
-
An electric drill and/or screwdriver.
-
Power tools or a hand saw, and a work bench to cut the wood.
-
Fixings (screws and wall plugs, and/or a nail gun and nails).
-
Pipe insulation (if using).
-
Sandpaper.
-
Filler or caulk.
-
Paint to finish the panels, if not buying pre-finished.
-
PPE - including safety glasses, face mask and gloves.
If you’re building your own boxing from sheets of wood or plastic, you’ll need to be confident in first cutting and fitting wooden battens to make the frame, then cutting the panels and fixing them together to form the covers. If you’re not as confident at DIY or carpentry, pre-made boxing may be your best bet. Read on for our handy guide on how to box in pipes yourself.
Choosing Your Method: Pre-Assembled vs. DIY boxing
The benefits of using pre-assembled pipe casing include time-saving, simplicity, speed, and requiring less cutting and fixing than self-built panels. This may suit those with lower confidence in carpentry and DIY. However, it can be more expensive, and you’ll have to fit your frame to the dimensions of the pre-made covers, which may not work so well in trickier room layouts.
By making your own panels, it’ll take a little longer, but you’ll have more flexibility in terms of size, style and finish. You’ll also have more choice of materials, but it needs a little more skill and effort to achieve.
The primary shapes of most home pipe covers include L-shaped boxing and U-shaped boxing. L-shaped has two sides, making it ideal for vertical or horizontal pipes - such as low floor pipes and radiator pipes - whereas U-shaped has three sides, designed for corner areas, freestanding pipes, or boiler pipes located in the middle of the wall.
How To Box In Pipes (step-by-step)
Installing pipe boxing requires some planning and the right supplies and tools for the job. The steps include:
-
Measuring and planning your structure, and deciding which materials to use.
-
Creating a wooden frame (battens) to provide support.
-
Building and securing your panels to cover the pipes, or installing pre-assembled pipe covers. You may wish to add insulation at this point.
-
Finishing your pipe boxing to leave a clean and tidy finish.
Here’s our simple guide on how to box in pipes yourself, using both pre-assembled boxing and DIY boxing.
Step 1: measuring and planning
Before starting, you’ll need to gather the required tools and PPE, and decide which material to use for your pipe boxing - including MFD, plywood, steel or plastic - and choose whether you’ll use pre-assembled boxing, or build your own. To work out how much wood you’ll need, measure and mark out the area accurately, making sure there’s a minimum of a 5mm gap between the boxing and the pipes. You’ll need to measure for the wooden frame, as well as the boxing panels. Don’t forget to leave extra space if adding insulation.
Remember that any pipe boxing must be able to be removed or accessed for maintenance. It’s best to earmark a place for an access panel and work this into your plan.
Step 2: creating the frame
Timber battens are ideal for creating the frame to add strength and support for your boxing. This is particularly important if you’ll be using the boxing as a shelf or for storage, or if it’s in a high-traffic area where it may become damaged. Use your spirit level and pencil to mark out where the battens will go, before cutting the wood to fit and fixing it to the wall (for the top of the boxing) and the floor (at the bottom) using screws.
Step 3: building and securing the panels
You can now re-measure and cut your panels to create the boxing (if using pre-made boxing you can simply cut it to size). At this point, you’ll also cut out your access panel area. Once the panels are ready, sand down any rough edges and begin fixing the panels to the battens. If you want to add pipe insulation to increase energy efficiency, you can add this before fixing the covers.
Step 4: finishing the pipe boxing
It’s now time to finish the boxing to fit your interior décor. You may want to use filler or caulk to cover screws and remove any unsightly gaps, but remember not fully seal the boxing to allow for ventilation. You can now paint the boxing, if not using pre-finished panels, and it’s even possible to wallpaper or tile the boxing to blend into the walls if you wish.
Recommended fixings and finishes
If you’re short of time or not fond of decorating, choosing pre-finished panels works well. These come pre-painted so that you don’t have to do it yourself. Filling in over the screws is also a good way of getting your boxing to blend seamlessly into your room. If you choose a thick enough wood panel, you can also tile over, paint, or wallpaper the area to make it seamless. Tiling works well for bathrooms or kitchen splash backs, whereas painting in existing colours and/or wallpapering over is perfect for living areas and bedrooms.
How To Box In Vertical Pipes - Special Considerations For Vertical Pipes
If you’re wondering how to box in vertical pipes, it’s perfectly possible to do it yourself - but it’ll require a little more planning, and you will likely need help to foot the ladder for you if you’re working at height.
-
It’s recommended to use U-shaped pipe covers for a better fit and finish.
-
Measure, mark out and build the batten frame as above, taking care in higher areas. It is trickier to measure out pipe work vertically, so take your time, and be sure to measure all around the pipes for the correct lengths required.
-
You can then cut your panels or pre-made covers to fit the frame, and cut your access panel area.
-
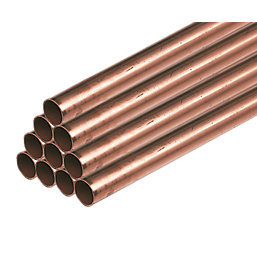
You can add insulation at this stage, if using, before attaching the panels to the frame carefully, leaving a gap between the copper pipes and covers.
-
Finish the boxing, as above, to provide a smooth and concealed aesthetic.
Aftercare For Boxing In Pipes
Common mistakes for less experienced DIYers include ordering insufficient materials (particularly if the pipes are in a difficult to reach place, or require U-shaped covers with three sides rather than L-shaped), so always add extra on for wastage. It’s important to remember that pipes must be able to be accessed, so don’t forget to add your removable inspection panel. It’s also vital to use the right material for the job. Anywhere damp, such as bathrooms, will need moisture resistant panels to avoid warping. For safety, we also recommend:
-
Using PPE, including an approved mask to prevent dust inhalation, as well as eye protection and gloves to avoid accidents with any power tools.
-
If working with higher pipes, ensure you have help to safely foot the ladder.
-
Never try to seal the boxing - it needs to be able to be removed, and requires ventilation for safety.
-
Always cut the frame and panels in a separate, well-ventilated area - never cut in-situ.
-
If you accidentally damage any pipes in the process, call a gas-registered engineer or plumber straight away.
What To Consider When Boxing In Pipes
Boxing in pipes may sound like a tricky job, but most people are able to do this themselves with the right planning. By measuring, ordering materials and ensuring you have the right tools beforehand, the job can be simple and straightforward. Remember to think about your materials to best suit the space as well as the desired finish. It’s also recommended to add pipe insulation before the boxing, to help improve your home’s energy efficiency, and it’s vital to include an access point for inspection and maintenance.
How To Box In Pipes - FAQs
All set to start boxing in your pipes? Read these frequently asked questions before you start, or pop into your local store to ask a staff member for more help.