Can You Cut LED Strip Lights?
Can You Cut LED Strip Lights?

LED strips can be cut, but only at certain points. It’s important to understand where these are in order to not break the entire circuit.
You can cut LED strip lights along the designated copper pads or ‘cut lines’, though cutting them elsewhere will damage the circuit and prevent the LEDs from working. It’s vital to only make alterations when the power is not connected.
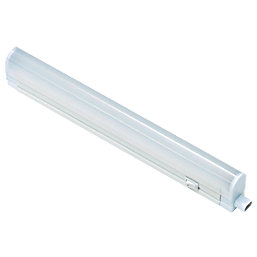
Shop LED Strip Light Related Categories


Key takeaways
Cutting LED strip lights is straightforward and requires no DIY experience, but it is important to know a few things before you get started:
-
Where to Cut – Always cut along the copper solder pads or printed cut lines in order not to destroy the circuit. Use sharp scissors for a clean cut.
-
Staying Safe – Make sure power is disconnected from the mains or transformer prior to cutting.
-
Reconnecting Segments – If you have cut off too much, you can reconnect segments using snap-on connectors or by soldering segments back together.
Can you cut LED strip lights anywhere?
LED strip lights work by internal circuits grouped together in series. This means that the strip can be cut without breaking the circuitry. However, you cannot cut LED strip lights anywhere, as there are designated areas that should be cut to ensure the lights continue to function properly.
Cutting LED strip lights along the copper dots or solder pads is the only way to ensure the remaining sections will still have a complete circuit. This is what makes the lights function.
Cutting along these points is okay, as LED strip lights are not one continuous circuit but are actually a series of repeating circuits. As a result, cutting them does not damage the circuit. Cutting anywhere else though will destroy the circuit and prevent it from working.
How to cut LED strip lights: Step-by-step
Cutting LED strip lights is simple, but knowing where to cut these strips is the difference between a broken circuit and functioning LED lights.
Step 1. Measure your space
Understanding how much LED strip lighting you’ll need is an important step in not cutting your reel too short. You should determine the exact distance you need the lights to cover, be it around an under-cabinet recess or architectural profile, before unpacking the reel. Proper planning will make the next steps even easier.
Step 2. Locate the cut marks
Knowing where to cut the LED strip lights is the next step, and the most important one. Look along the tape strip for any visible copper soldering pads or a faint scissor icon printed on the circuit backing.
These copper pads often appear in a rounded or capsule-like shape in columns at regular intervals along the strip backing.
Once you’ve identified the copper or cut line, you now need to ensure you can cut safely.
Step 3. Disconnect the power
Once you know where to cut the LED strip lights, it’s important that you recognise how to cut LED strip lights safely.
Before cutting any LED strips, it’s paramount that you disconnect them from the power by unplugging the power supply adapter from the wall or disconnecting the wiring loop from the mains transformer.
Once that’s done, you can cut along the previously identified line.
Step 4. Make a clean cut
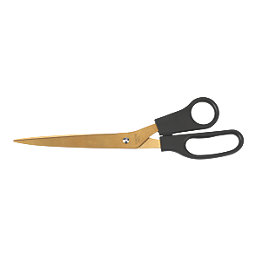
The best method for cutting LED strip lights is using sharp scissors or heavy-duty wire shears to ensure a clean cut. You want a clean cut that clips straight through the centre line of the copper pads to avoid twisting the backing tape or damaging other areas of the circuit.
Safety tips when cutting LED strips
There are some important safety tips that you should always keep in mind when learning how to cut LED strip lights properly:
-
Check Voltage Ratings – Confirm if you are dealing with low-voltage direct current (12V/24V) or direct mains voltage strips. Low-voltage direct current strips (12V/24V) carry a much lower risk of electric shock compared to mains-powered strips. Mains voltage LED strips must always be disconnected from power before cutting, as electrical isolation is essential to prevent serious injury.
-
Protect Against Static Discharge – Work on clean, non-conductive worktops. This will prevent static discharge from damaging the circuitry.
-
Watch for Exposed Conductors – Exposed copper pads at the cut end can short-circuit, spark, or burn out the lights if they touch bare metal channels without an insulating barrier. Apply electrical tape or plastic tubing to the ends if this is the case.
-
IP Rating Isolation – Cutting waterproof, resin-coated strips breaks their weather seal and requires silicone end-caps to prevent exposure.
Common mistakes when cutting LED strip lights
Once you can cut LED strip lights, you should still be aware of common mistakes that are often made:
-
Cutting Between Pads – Snipping the printed circuit board rather than the designated copper pad is a common error that results in a destroyed circuit. You cannot cut LED strip lights anywhere and must ensure you do so in the designated area.
-
Blunt Tools – Using dull household scissors that squeeze or crush the internal circuit layers together rather than offering a clean cut can cause short circuits.
-
Polarity – When reconnecting, aligning positive wires to negative terminals will break the circuit.
How to reconnect and install cut LED strips
Once you have cut your LED strip light to size, it is a good idea to test it to see if it is working properly. Once this is done and there are no issues, you can begin to install the lights.
-
Make sure surfaces are clear of dust and dirt before installing to make sure the adhesive backing will stick as effectively as it should. Allow all surfaces to dry before mounting your LED lights.
-
Slowly move along the surface you want to install the lights on, removing the adhesive backing as you go and sticking it firmly in place.
-
Turn the lights on and correct any areas that need smoothing down.
If you have cut your LEDs too short, you can reconnect them. This would need to be done using either snap-on LED strip connectors or, if you’re comfortable with a soldering iron, by soldering the sections together.