
How To Tile A Bathroom
How To Tile A Bathroom

How To Tile A Bathroom
Tiling a bathroom is a straightforward DIY job if you have the right tools and materials, measure accurately, follow the correct instructions, and do all the thorough prep.
Doing it yourself can help you save a significant amount of money in labour costs and gives you full control over the finish. The key to a professional result isn't complicated: start with solid prep, find your centre point, and use the right adhesive for the job.
Mark the centre point of your main wall and dry-lay a row of tiles to check end cuts before any adhesive goes down. Always tile walls before floors; working overhead risks dropping tools and adhesive onto fresh floor tiles.
Shop Tiling Related Categories

Key Takeaways
Tiling a bathroom is a straightforward DIY job — if you follow the right sequence and don't rush the prep.
-
Start with surface prep — walls and floors must be clean, flat, dry, and structurally sound before any adhesive goes down. Fit tile backer board in wet zones and apply a tanking kit in showers.
-
Plan your layout before you tile — find the centre point of the main wall, snap plumb chalk lines, and dry-lay a row to check end cuts. Use the 3-4-5 rule to guarantee square starting lines.
-
Tile walls before floors — working overhead risks dropping adhesive onto fresh floor tiles. Fix a timber batten at your first full row height to support tiles while the adhesive sets.
-
Use the right products — flexible waterproof adhesive, mould-resistant grout, and sanitary silicone sealant throughout. Never use standard paste or rigid grout in a wet environment.
-
Allow 24 hours for adhesive to cure — grouting too early traps moisture, weakens the bond, and leads to loose tiles.
-
Seal every internal corner with silicone — grout cracks as walls and floors naturally move. Silicone stays flexible and prevents water getting behind the tiles.
-
Order 10% extra tiles — covers cuts, awkward pipe shapes, and breakages. Running short mid-job means delays and potential colour batch mismatches.
Tools and materials you will need
Get all your tools and materials lined up before you start.
Tools
-
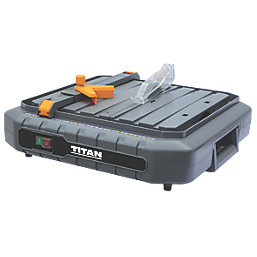
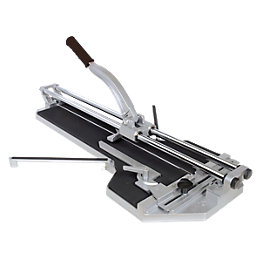
Tile cutter (manual or electric)
-
Notched trowel
-
Grout float
-
Tile spacers
-
Spirit level or laser level
-
Tape measure and pencil
-
Bucket and tile sponge
Materials
-
Bathroom tiles
-
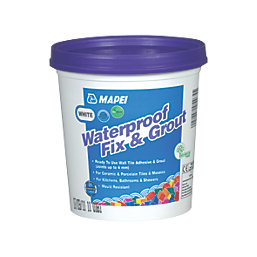
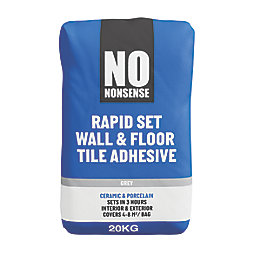
Waterproof tile adhesive
-
Mould-resistant grout
-
Sanitary silicone sealant
Trade tip: Order 10% extra tiles to cover corner cuts, awkward pipe shapes, and accidental breakages.
How to prepare your bathroom for tiling
Walls and floors must be completely clean, flat, dry, and free of dust, grease, and loose debris. Fill holes and cracks, sand flush, and scrape away flaking paint. Check that the existing skim coat or plasterboard is sound enough to take the weight of the tiles. Floors need a rock-solid, level substrate. Any flex underfoot will crack grout lines and blow tiles loose.
Common substrates include bare plaster, standard plasterboard, and tile backer board. Check your adhesive packaging to confirm whether priming is required before trowelling. Tile backer board is the best choice for wet areas, as it is rigid, moisture-stable, and won't degrade.
In showers and direct splash zones, apply a paint-on tanking or waterproofing kit before any tiles go up. This locks moisture out of the wall completely.
What is the 3-4-5 rule
The 3-4-5 rule gives you a perfect 90-degree starting angle before a single tile goes down.
If your starting corner isn't square, tile rows run crooked across the entire wall or floor, leaving uneven gaps at the edges that can't be fixed without starting again.
How to apply it:
-
Mark a point exactly 3 units (30 cm) along your baseline from the corner.
-
Extend a line up the adjacent wall or floor and mark it at 4 units (40 cm).
-
Measure diagonally between the two marks. Adjust the perpendicular line until the diagonal reads exactly 5 units (50 cm).
How to set out your tiles
Once your corner is square, dry-lay a row of tiles along both reference lines before mixing any thinset. This confirms the 3-4-5 angle holds true across the full run, not just at the corner itself, and lets you check perimeter gaps on both ends before anything is fixed in place. Adjust the starting line now if either edge cut comes out as a sliver under half a tile wide: it's far easier to shift the layout at the dry-lay stage than to lift and relay tiles once they're bedded in mortar.
How to tile a bathroom: step-by-step
Tiling a bathroom correctly comes down to prep work, the right materials, and getting the sequence right. Clear and flatten all surfaces first. Plan your layout before any adhesive goes down. Work from wall to floor, tile to grout to silicone. Rush any stage and you risk cracked tiles, failed adhesion, or leaks behind the wall.
Step 1: Apply the adhesive
Mix waterproof adhesive to a smooth, lump-free consistency as per the pack instructions.
Spread onto the substrate with a notched trowel, combing straight ridges in one direction for maximum contact. Fitting large-format tiles? Back-butter the reverse of each tile with a thin layer of adhesive as well as combing the wall or floor. This guarantees full bed coverage and eliminates hollow air pockets underneath.
Step 2: Lay the tiles
Press your first tile into the adhesive with a firm, twisting motion to ensure full contact and eliminate air pockets. Place tile spacers at every corner to keep your joint widths completely uniform across the entire surface. Work systematically in small sections, using a spirit level as you go to check that every tile sits flush, flat, and perfectly aligned with its neighbours before the adhesive sets.
Step 3: Cut tiles to fit
Measure the gap between your last full tile and the wall, subtract for spacers, and mark the cut line on the tile face with a pencil.
Use a manual tile cutter for straight cuts along perimeter edges and borders. For curved cuts around pipes or sanitaryware, use tile nippers to nibble away small sections, or a diamond-blade angle grinder for smooth, precise radiuses.
Step 4: Leave the adhesive to cure
Give the adhesive plenty of time to set completely before walking on floor tiles or filling joints. Grouting too early traps moisture beneath the surface, weakening the bond and leading to loose tiles down the line. Always follow the manufacturer’s specified drying time, usually 24 hours, to ensure a solid, long-lasting bed.
Step 5: Grout the tiles
Hold a rubber grout float at 45 degrees and work mould-resistant grout into the joints using diagonal sweeps until every gap is completely filled. Let the grout firm up slightly, then wipe excess from the tile faces with a damp, well-wrung sponge. Rinse the sponge regularly as a dirty sponge smears grout across the surface rather than removing it.
Step 6: Seal the edges
Apply a continuous bead of sanitary silicone sealant along all internal corners, floor junctions, and around sanitaryware edges.
Unlike grout, silicone stays flexible. It accommodates natural building movement and stops water seeping behind tiles. Smooth the bead immediately with a sealant finishing tool or wet finger before it skins over.
How to tile a bathroom wall
Fix a level timber batten to the wall where your first full row of tiles will sit.
This temporary ledge supports the tile weight and stops them slipping while the adhesive sets. Work upwards from the batten, checking vertical lines regularly with a spirit level. Once the top section has cured, remove the batten and tile the bottom cut row last, filling the gap down to the floor or bath edge to complete the finish.
How to tile a bathroom floor
Floor tiling needs a few specific adjustments.
Use a flexible floor tile adhesive to absorb underfoot movement. Start laying from the furthest corner and work back towards the doorway, tiling yourself into a corner means walking across fresh tiles to get out. Leave the floor to cure for a full 24 hours before stepping on it.
For shower enclosures, extra waterproofing is essential. Tank walls and the tray area with a liquid membrane before tiling, and seal all internal corners with sanitary silicone. For full substrate prep and floor layout guidance, see our how to tile a floor guide.
How to tile a shower
Shower tiling demands strict waterproofing as constant direct water exposure leaves no margin for error.
Before a single tile goes up, fit waterproof tile backer boards and apply a full liquid tanking kit over walls and tray seams. Use a flexible C2-class waterproof adhesive and apply using the full-bed method — comb adhesive onto the wall and back-butter each tile to eliminate hollow pockets where water can pool behind.
Grout joints with mould-resistant, water-repellent grout. Never grout internal corners. Seal all wall-to-wall and wall-to-tray junctions with a continuous bead of anti-fungal sanitary silicone. This makes sure it stays flexible, absorbs natural building movement, and prevents leaks.
Common tiling mistakes to avoid
Avoiding these mistakes will make tiling a bathroom much easier.
-
Skipping surface prep — tiling over dusty, uneven, or weak substrates causes tiles to debond. Clean, repair, level, and prime before anything goes up.
-
Starting from a corner — sets you up for awkward, narrow slivers on the opposite side. Always find the centre point and mark the guidelines first.
-
Wrong adhesive or grout — standard pastes and non-flexible grouts fail in wet environments. Use water-resistant, flexible adhesive and mould-resistant grout throughout.
-
Skipping tile spacers — eyeballing joints leads to crooked rows and uneven lines. Use plastic spacers at every junction.
-
Grouting too early — applying grout before adhesive fully cures traps moisture and weakens the bond. Wait at least 24 hours.
-
Grouting internal corners — grout cracks as walls and floors naturally shift. Seal all internal junctions and tray edges with flexible, anti-fungal sanitary silicone.