How to Attach Skirting Board Easily
How to Attach Skirting Board Easily
Contents:

It’s important for DIY enthusiasts to know/remember that the majority of tasks can be learned through clear instruction and repetition. This includes learning how to attach a skirting board.
No matter if you’ve never picked up a mitre before or you’ve done it a few times, a professional finish is possible if you prepare well and follow this guide. It will show you how to attach a skirting board to different wall types and plaster, as well as how to attach one without nails, and the proper ways to ensure a professional-looking finish.
Shop Skirting Board Related Categories


Key Takeaways
-
Safety and Preparation: Always use a pipe and cable detector to avoid utilities, and allow materials to "acclimatise" in the room for 48 hours to prevent warping or shrinking after installation.
-
Methodical Installation: Choose the right fixing based on wall type (e.g., adhesive for plasterboard, screws for masonry, or nails for timber studs) and use "scribed" joints for internal corners to ensure a flush fit on uneven walls.
-
Professional Finishing: Use wood filler for sandable joints and nail holes while applying flexible decorator’s caulk only to the top gap between the board and the wall to accommodate house movement.
-
Maintenance and Aftercare: Protect the finish with two coats of paint, use felt pads on furniture to prevent scuffs, and avoid soaking MDF boards during cleaning to prevent moisture damage.
Why It’s Important To Know How To Attach Skirting Board Properly
It’s important to know how to attach skirting boards properly. This is because they help ensure the room you are working on has a professional aesthetic. They also play a vital role in protecting the lower wall from everyday wear and tear from vacuum bumps, scuffs and moisture. They are also crucial in hiding the expansion gaps between the floor and the wall, preventing dust build up too.
As a result, poor installation of a skirting board can lead to the following problems:
-
An unprofessional finish that looks unattractive
-
Gaps between the wall and the floor where dust, moisture and mould can develop.
-
The risk of puncturing pipes or electrical cables
-
Warping of the skirting board can cause trip hazards
Any of these issues can prove costly to fix.
It’s important to remember that different walls require different fixing approaches.
What You’ll Need To Attach Skirting Board Efficiently
Below is a list of tools and materials needed to attach skirting boards. Not all tools are required for all methods.
-
Tape measure
-
Spirit level–To ensure straight alignment
-
Mitre saw or mitre box – To clean internal and external corners
-
Caulking gun – Great for adhesive and finishing gaps.
-
Drill–Useful for drilling into masonry/brick walls. Helpful for preventing wood from splitting.
-
Pipe/cable detector–Crucial for maintaining safety standards when attaching a skirting board. It helps to avoid cracking pipes or tearing electrical cables.
-
Hammer and lost-head nails–Easy to hide, a fast installation and great for stud walls and finish work.
-
Sharp pencil - To add clear markings
-
Fine-grit Sandpaper – To sand down the edges of the skirting board
-
Damp cloth – To clean up
-
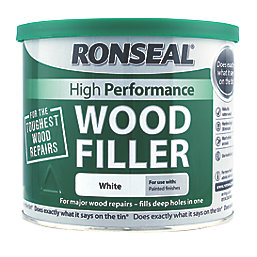
Wood filler – To hide imperfections
-
Coping saw – If the wall isn’t exactly 90 degrees, a gap will be left during the installation process. This helps the skirting board to fit perfectly, despite a lack of a 90-degree wall.
Fixings and adhesives
The table below shows the best fixing methods for attaching a skirting board to a wall, depending on the wall type.
|
Fixing Method |
Best for |
Wall Type |
Pros |
Cons |
|
Modern homes with flat, smooth walls. |
Plasterboard / Drywall |
No visible holes to fill. Fast and easy installation. |
Won't pull a board into a curved/bowed wall. Hard to remove without causing damage. | |
|
Lost-Head / Oval Nails |
Standard installation on timber frames. |
Timber Stud Walls |
Traditional, reliable mechanical fix. Minimal damage to the board. |
Must find the studs (using a stud finder); requires filling/sanding. |
|
Masonry Nails |
Quick fixes on solid walls. |
Brick, Block, or Stone |
Faster than drilling and screwing for solid surfaces. |
Can be difficult to drive straight; risk of cracking plaster or bending the nail. |
|
Screws & Wall Plugs |
Heavy boards or very uneven/bowed walls. |
Masonry or Metal Studs |
Strongest fix. Can "pull" the board flush against a wonky wall. |
Most time-consuming method. Requires drilling, countersinking, and filling. |
|
Hybrid Method (Adhesive + Nails) |
Professional finish on almost any wall. |
Any (Stud or Masonry) |
Adhesive does the heavy lifting; nails hold it in place while the glue sets. |
Requires multiple tools (e.g., glue gun and nail gun). |
Step-By-Step Guide: How To Attach Skirting Board Efficiently
This guide will give you simple, in-depth instructions on how to attach a skirting board effectively.
Step 1 – Measure and prepare the wall
To prepare the wall, strip away any old adhesive, existing nails, or loose plaster, before using a chisel to remove any bumps. Next, measure the perimeter and add 10-15% extra for cutting waste and mitre joints.
Step 2 – Cut skirting boards to size
There are three main ways to cut skirting boards to size, depending on the situation.
-
Straight Cuts (End-to-End): First measure the wall, marking this on the face of the skirting board. Then cut the skirting board slowly, using a saw.
-
External Corners (Mitre Cut): Again, measure the wall, and mark the back of the skirting board. Set a mitre saw to 45°, positioning the blade away from your mark. Cut the connecting board at the opposite 45° angle. Hold both pieces together at the corner.
-
Internal Corners (Scribed Cut): Cut the first board square and fix it flush into the corner. Cut the end of the second board at a 45° angle (as if you were making an internal mitre). This reveals the "profile" or shape of the moulding. Take a coping saw and cut along that profile line at a slight inward angle (back-cutting). The result looks like a mitre but handles wonky walls much better.
Step 3 – Fixing to the wall
The methods to fix the skirting boards depend on the type of wall you’re working on.
|
Masonry/Brick Walls |
Stud/Plasterboard Walls |
External Corners |
|
Use a drill to create pilot holes through the skirting into the wall. Insert wall plugs and drive in screws or masonry nails. |
Use a stud finder to locate the timber vertical studs. Fire lost-head nails or 2nd-fix nail gun pins through the skirting into those studs. |
Apply a small amount of wood glue (PVA) to the mitre faces before pinning them together. This prevents the corner from "opening up" as the wood dries. |
Step 4 – Finishing your skirting boards
There are a few steps to finishing your skirting boards, all of which must be done to ensure a professional finish.
-
Filling and Sanding: Fill all nail and screw heads with wood filler until they are slightly overfilled, ensuring you also add a small amount of filler to mitre joints on external corners. Once dry, sand down with 120-grit sandpaper until it is flat.
-
Caulk the Gaps: Run a bead of decorator’s caulk along the top edge. Use caulk for the top gap and wood filler for corner joints. When caulking the top gap use a caulking gun, cutting the nozzle at a 45° angle. Smooth the bead with a damp finger once done.
-
Paint: If using bare wood or MDF, apply a primer or undercoat first. After, apply two coats of your chosen finish.
How To Attach Skirting Boards Without Nails
-
Ensure the wall is clean, dry, and free of loose plaster or dust.
-
Cut your boards to size and place them against the wall to check the fit.
-
Using a cartridge gun, apply a high-grab adhesive (like No More Nails, Gripfill, or Stixall) to the back of the board in a continuous zigzag.
-
Press the board firmly against the wall.
-
If the wall is uneven and the board wants to pull away, use heavy weights (like a toolbox) to hold the board in place while it cures.
-
Wipe away any immediate excess adhesive with a damp cloth. Once the adhesive has set (usually 24 hours), seal the top gap with the decorator's caulk.
When done correctly, this method is reliable and can ensure that the skirting board stays in place for years to come.
How To Attach Skirting Board To Different Types Of Walls
Stud walls (Timber frame)
These are hollow walls made of wooden vertical beams (studs) covered in plasterboard.
-
Use a stud finder or tap the wall until you hear a solid "thump" rather than a hollow ring. Mark these spots.
-
Apply grab adhesive to the back of the board.
-
Place the board and fire 64 mm finish nails (via a nail gun) or drive lost-head nails through the board directly into the timber studs.
Solid Masonry Walls
These walls are tough and don't take nails easily. You have two main options here:
A) The "Glue & Pin"
-
Apply a generous amount of high-strength grab adhesive.
-
Press the board to the wall.
-
Use a few masonry nails just to hold the board in place while the glue dries.
B) The "Screw & Plug"
-
Drill pilot holes through the skirting board.
-
Hold the board against the wall and poke a drill bit through the holes to mark the brickwork.
-
Drill the wall, insert rawlplugs, and screw the board to the wall.
-
Countersink the screws so the heads sit below the surface, then hide them with wood filler.
"Dot and Dab" walls
-
Use plenty of grab adhesive on the board.
-
Standard plugs often get lost in the cavity. Use concrete screws or frame fixings that bridge the gap and grip the solid brick behind the plasterboard.
-
If the wall is fairly straight, you can sometimes get away with just a high-quality "foaming" adhesive that expands slightly to fill the gap.
Be sure to knock on the wall to check what type of wall it is. If it sounds hollow everywhere, it’s likely a Timber Stud wall. If it sounds hollow in most places but "solid" in random patches, it’s Dot and Dab
How To Attach Skirting Board To Plaster
When attaching a skirting board to plaster, the following must be taken into consideration:
-
Wall Preparation: Remove any old adhesive, wallpaper, or plaster, chiselling away lumps to ensure a flat wall. Wipe down with a cloth.
-
The ‘Dry Fit’: Check for any uneven spaces or gaps before attaching the board to the wall - you will need more adhesive to bridge these spots.
-
Applying Adhesive: Apply a zigzag of solvent-free ‘grab adhesive’ on the back of the board. Keep glue 2cm from the top edge.
-
Fixing the Board: Set the bottom edge on the floor and push the board firmly against the wall. If the plaster is bowed, use a heavy object to press it to the wall.
-
Final Sealing: After approx. 24 hours, run a bead of decorator’s caulk along the top join where wood meets plaster. Run a finger along the caulk for a clean finish.
Aftercare And Maintenance Once Skirting Boards Are Fitted
1. Cleaning routine
-
Use the brush attachment on your vacuum or a microfibre cloth to remove loose dust.
-
Rubbing a tumble dryer sheet over clean skirting boards leaves a light anti-static coating that actually repels dust.
-
For scuffs or mud, use a cloth wrung out in warm soapy water, or a melamine sponge.
Caution: If you have MDF skirting, ensure the cloth is only damp, not soaking. Excess water can seep into unsealed edges and cause the MDF to swell or "blow."
2. Minor repairs and maintenance
Houses naturally "settle" over the first 6–12 months after a renovation, which can affect your skirting joints.
-
If a gap appears between the top of the board and the wall due to house movement, simply run a fresh bead of decorator’s caulk over the old one and smooth it down.
-
Keep a small sample pot of the original paint. If the boards get chipped by a vacuum cleaner or furniture, sand the area lightly with 240-grit paper, apply a dab of filler if needed, and touch up with the paint.
3. Long-term protection
-
Place felt pads on the legs of chairs or tables that sit near the walls to prevent them from "clashing" with the skirting and chipping the paint.
-
In bathrooms or kitchens, check the bottom edge periodically. If you see the paint starting to peel or bubble, it’s a sign of moisture ingress. Reseal the floor-to-skirting joint with a clear silicone sealant to provide a waterproof barrier.
Common Mistakes To Avoid When Attaching Skirting Boards
-
Installing immediately (Acclimatisation) – Avoid fitting boards the day they arrive. Timber and MDF need 48 hours in the room to adjust to the temperature and humidity to prevent shrinking or warping.
-
Mitring internal corners – Don't use 45° cuts for inside corners. Most walls are not perfectly square. Scribing (cutting one board to the profile of the other) ensures a tight fit on wonky walls.
-
Ignoring "Plaster Kick" – Plaster often bulges at the bottom of the wall. Failing to chisel away this excess prevents the skirting from sitting vertically flush against the wall.
-
Blind fixing – Never nail or screw without using a pipe and cable detector. Plumbing and electrics often run behind the skirting line.
-
Butt-joining long runs – Do not join two boards with flat 90° ends. This creates visible cracks. Use an overlapping scarf joint (45° angle) to make the joint invisible.
-
Skipping the wood glue – Adhesive on the back of the board isn't enough for the corners. Always use PVA wood glue on the mitre/scribe joints themselves to prevent them from opening up.
-
Over-filling joints – Don't use flexible caulk in corner mitres; it can't be sanded. Use sandable wood filler for joints and save the caulk only for the top gap against the wall.
-
Improperly matching the fixing method to the wall: Failure to do this can delay your project and prove costly. The screw & plug method is best for crumbly mortar or brick, whilst heavy screws without pilot holes could shatter a plaster wall