How to Apply Danish Oil on Oak
How to Apply Danish Oil on Oak

Oak is a strong and hard wearing timber that is known for its striking open grain patterns. As well as naturally looking good, oak also looks great with an oil finish.
One oil finish you might like to use on your oak timber is Danish oil. When Danish oil is used on oak, it brings out the grain, adds depth to the colour and gives it a slight shine. Danish oil is popular on oak items like furniture, floors, kitchen worktops, utensils, garden furniture and even on garden fencing.
It’s important to know how to use Danish oil before you start applying it to woodwork. You need to prepare the surface properly before you start. You also need to follow the right application process to end up with a smooth, even and glowing finish. There are also a few pitfalls to avoid so you don’t end up with a hazy or sticky finish.
In this article, we’ll tell you how to apply Danish oil, including how to prepare wood for oiling, how to apply the oil and how many coats of Danish oil to apply.
Shop Decorating Related Categories


What do you need to use when applying Danish oil?
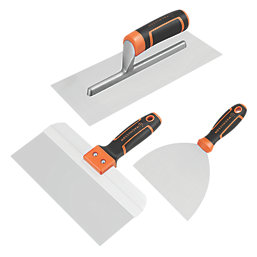
Here’s everything you need to apply Danish oil on oak:
-
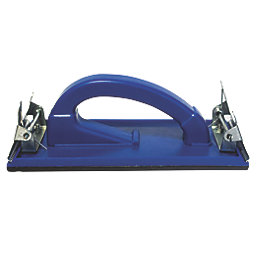
Sanding tools – sandpaper and wire wool for preparing the timber and smoothing the surface between coats
-
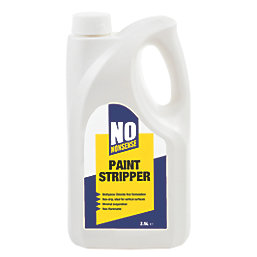
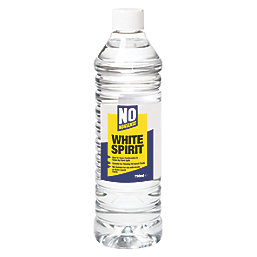
White spirit and cleaning cloths – for cleaning off old finishes
-
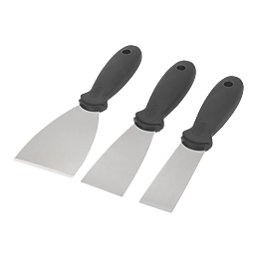
Paint brush, microfibre cloth or lint free cloth – for applying the Danish oil
-
Polishing tools – to buff the surface
-
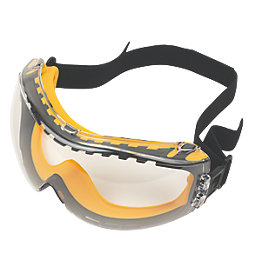
Work gloves and safety glasses – for protecting your hands and eyes while you’re working
-
Drop cloth - for protecting the area around where you’re working
Different types of Danish oil
There are actually many different types of Danish oil.
The term Danish oil does not refer to any particular blend or type of oil. Danish oils are made from a variety of different oils and chemicals, meaning there’s a lot of variation between different brands and products. The exact blend of oils and chemicals also affects how the oil will look as well as how it should be applied.
Some Danish oils are specially enhanced for outdoor use, and some are also coloured or tinted.
Before you apply Danish oil, make sure you check the instructions that come with your product to see if there are any special requirements.
How to apply Danish oil on oak - Step-by-step
In this section, we’ll explain how to apply Danish oil. The method outlined here will work for tung oil and linseed oil based Danish oils, which are the most common types of Danish oil. The method will also work for all types of surface, whether you need to apply Danish oil to a worktop or to any other oak woodwork item.
Always check the instructions that come with your particular product to see if there are any special requirements for how to apply it.
Safety: It’s important to be aware of the risk of fire with cloths and other equipment you use to apply Danish oil. These items can spontaneously combust if they are not dried out correctly. Always lay cloths out flat to dry, and make sure they are not touching each other. Wash brushes in warm, soapy water before laying them out flat to dry. Do not put wet equipment in a pile or inside a container.
Step 1. Prepare the surface
Surface preparation is always key with any oil finishing project on woodwork.
The best thing is to apply Danish oil onto oak that has had any old finishes removed and which has been sanded with fine sandpaper to leave a smooth finish.
Use white spirit and cleaning materials to remove any varnish, shellac, stain or wax that is on the surface of the wood. Then sand the surface back to leave a smooth finish. Use fine sandpaper and sand with the grain.
You can also use grain filler on oak if you’d like the smoothest possible finish.
Finally, clean the surface with a clean microfibre cloth or a lint free cloth.
Step 2. Apply the first coat of oil
The next step is to apply Danish oil to the timber.
You can use a paint brush or a cloth, depending on personal choice. If you use a brush, pick a brush suitable for paint and varnish. If you use a cloth, lint free cloths are best, although you can use a clean microfibre or cotton cloth.
Use your cloth or bush to apply Danish oil to the worktop or other woodwork item you’re finishing. Apply oil generously to the entire surface, making sure you spread it evenly everywhere.
Keep applying it until the surface appears to be wet with oil.
Step 3. Let the oil soak in and then remove excess oil
The next step is to let the oil soak in to the timber and then remove the excess from the surface.
This is an important part of applying Danish oil to woodwork. You need to make sure you get all the excess oil off or else it can pool on the surface and form a tacky film of oil.
Normally, you need to wait for 10 – 20 minutes before you remove the excess. The amount of time can vary depending on the type of wood you are applying it to and atmospheric conditions. Make sure the oil has time to soak in but don’t let any excess oil form a tacky film on the surface. To help work out when to remove the excess, you can look at the surface to see when the colour starts to dull slightly. This means the oil has soaked into the wood.
When you apply Danish oil on oak for the first time, it can absorb the oil more quickly than with subsequent coats.
Step 4. Leave the oil to dry
Before you do anything else, you need to leave your coat of oil to dry.
Tung and linseed based Danish oils typically dry in 4 – 8 hours. Other oils can have additives that make them dry in a shorter time. The best thing is to check the tin for drying times.
Step 5. Rub the surface back between coats
After you’ve let your first coat of Danish oil dry, you can rub the surface over with fine grade sanding tools. This will help to smooth the surface, so you end up with a more uniform finish.
Use fine sandpaper (at least 320 grit) or ultra fine wire wool (0000 grade) to gently rub the surface back. Only use hand sanding tools, always work in the same direction as the grain, and apply gentle pressure while you’re working.
If you’re applying Danish oil to a worktop or another flat surface, this will help to leave a smooth finish with a slight sheen.
Step 6. Apply additional coats
After you’ve finished your first coat, you simply need to repeat the same process with subsequent coats.
There’s no exact answer for how many coats of Danish oil to apply to oak. Most people tend to apply Danish oil in 2 – 3 coats. However, you might find on oak that 3 or even 4 is best because it is quite a porous timber.
You won’t need to apply as much oil on subsequent coats.
Do not sand or rub back the finish after you apply the final coat of oil.
Step 7. Buff the final coat
You should buff the final coat you apply after it’s had time to cure so the surface is as smooth and shiny as possible. Normally, you need to wait 48 – 72 hours to give Danish oil enough time to cure and become hard enough for buffing.
After it has had time to cure, spend some time buffing the surface with a microfibre cloth or with specialist polishing tools. Work gently at first, particularly if you’re working with power tools, and build up the amount of pressure you apply as you polish the surface.
You can also apply wax to the surface for an extra smooth and glossy finish.
Remember that used rags and other Danish oil application equipment is a fire hazard. Make sure you dispose of all equipment correctly.
Common mistakes when applying Danish oil
Here are some of the common mistakes people make when they’re first learning how to use Danish oil:
-
Not disposing of rags and application equipment correctly - Rags and other equipment soaked in Danish oil can spontaneously combust. Make sure you dispose of it correctly.
-
Using dirty or lint heavy cloths – It’s best to use clean cloths with little or no lint to avoid polluting the oil with dust and other imperfections.
-
Not stirring Danish oil before use – Danish oil needs a good stir to mix up all the ingredients properly. Do not shake it or else bubbles can form in the oil.
-
Not preparing the timber properly – Good preparation is one of the most important things for a good oil finish on timber.
Key considerations when applying Danish oil
Well finished oak woodwork and furniture will last for generations, and Danish oil is a good choice for many types of oak woodwork.
If you want to finish your oak woodwork items with Danish oil, just be careful not to rush into things too quickly. Take the time to do a good job of the preparation, in particular. With oil finishes, the preparation always has a big influence on the final result.
Also, be careful you know how to use Danish oil before you start. You need to remove the excess oil properly, so you avoid problems like tackiness and an uneven finish, in particular.
Danish oil is normally used on indoor items, but it looks great on garden furniture and outdoor timber as well, as long as it gets the right care. Find out how to take care of fences and decking.