Sealing Plaster Before Painting
Sealing Plaster Before Painting

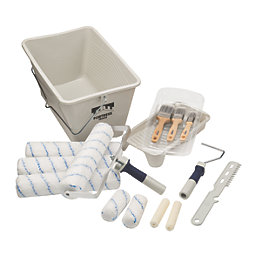
Shop Painting Plaster Related Categories

Key Takeaways
-
Patience with Drying: New plaster must be completely dry—changing from dark brown to a uniform pale pink—before sealing; painting too early traps moisture, leading to bubbling, flaking, or mould growth.
-
Avoid PVA: Never use PVA to seal plaster before painting, as it sits on the surface rather than bonding with it, which causes the paint to peel and prevents the wall from "breathing".
-
Proper Sealing Methods: Use a mist coat (standard matte emulsion thinned with water at a 3:1 ratio) or a specialist plaster primer to satisfy the wall's high suction and create a stable foundation for topcoats.
-
Surface Preparation: Lightly sand the wall to remove "nibs" and thoroughly vacuum or wipe away all plaster dust; failing to remove dust prevents the sealer from adhering correctly, resulting in a gritty, uneven finish.
Why Seal Plaster Before Painting?
Not sealing plaster before painting properly is a common DIY mistake, but it can have costly consequences.
Because new plaster is naturally "thirsty" and highly absorbent, it draws the moisture out of standard emulsion paint far too quickly. This prevents the paint from forming a proper bond, resulting in a finish that may look patchy or, in the worst cases, peel off in large sheets like wallpaper. By sealing the surface first, you ensure the paint dries at a consistent rate.
Sealing plaster before painting your walls helps with the following:
-
Improves paint adhesion – Creates a stable "key" for the topcoats to grip onto.
-
Prevents an uneven sheen – Ensures the finish looks uniform rather than having dull and shiny patches.
-
Reduces paint consumption – Stops the wall from soaking up expensive topcoats, saving you money.
-
Protects against moisture issues — Helps stabilise the surface to prevent future flaking or bubbling.
-
Prepares the wall for a smooth finish – Provides a professional-grade foundation for a flawless look.
When Do You Need To Seal Plaster?
Sealing plaster before painting is essential when you are dealing with:
-
New plaster - It is very porous and requires a base layer to manage suction.
-
Repaired walls - Wherever fresh patches of plaster or filler have been applied. These areas will absorb paint differently from the surrounding surface.
However, old plaster that has the following characteristics:
-
Previously painted
-
Remains in good condition
-
Non-porous
Doesn’t need sealing. The standard topcoat will have good adhesion.
Choosing The Best Sealer For Plaster
When sealing is required, there are two main options:
-
Mist coat – A watered-down layer of standard emulsion paint. Because it is thin, the plaster "drinks" the mixture, creating a rooted foundation that prevents the topcoat from peeling.
-
Plaster primer – a chemical sealer designed specifically for high-suction surfaces. It contains specific resins that seal the surface while providing a "gritty" key for the paint to stick to.
It’s important to remember that PVA is not suited to sealing plaster because of the following reasons:
-
Poor Adhesion: Paint needs to "sink" into the plaster to bond. PVA sits on top, meaning your paint is essentially sticking to a thin layer of glue rather than the wall.
-
Reactivation: When you apply water-based emulsion paint over PVA, it can soften and lose its grip, causing the paint to bubble or peel.
-
Breathability: New plaster needs to "breathe" to get rid of the remaining moisture. PVA seals it in, which can cause damp issues.
How To Seal Plaster Before Painting
Step 1 – Verify the Plaster is Dry
Never seal damp plaster. New plaster must turn from a dark, patchy brown to a uniform pale pink. Depending on the season and ventilation, this can take anywhere from 1 to 4 weeks.
Step 2 – Prepare the Surface
Lightly sand the wall with fine-grit sandpaper (120-180 grit) to remove any small bumps or "nibs". Thoroughly wipe the walls with a slightly damp cloth or a vacuum brush attachment.
Step 3 – Apply Your Plaster Sealing Method
Mist coat
Use a standard, non-vinyl matte emulsion. In a separate bucket, mix 3 parts paint to 1 part water. Stir thoroughly until the consistency is thin and runny, similar to single cream.
Plaster Primer
Ensure the plaster is fully dry, has a pale pink colour and is free from dust or grit. You can apply plaster primer straight from the tin without thinning it.
Most plaster primers dry quickly, often allowing for a topcoat within 2 to 4 hours, though some oil-based versions may require longer.
Step 4 – Apply the Sealer
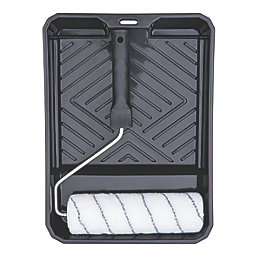
Use a brush for the edges and corners. Then use a medium-pile roller for the main sections. The mixture is thin and will drip. Work quickly and catch any runs immediately with your roller.
Step 5 – Allow the Sealer to Cure
Let the sealer dry completely for at least 24 hours. The wall will look patchy once the mist coat dries; this is normal. It has now equalised the "suction" of the wall, making it ready for your full-strength topcoats.
Common Mistakes When Sealing Plaster
Some of the most common mistakes when sealing plaster include:
Painting too soon – Applying any sealer whilst the plaster is still damp will trap moisture. This leads to the paint bubbling and flaking, and in some cases, mould growth.
Applying undiluted paint – Using thick paint for your first coat prevents penetration into the plaster pores. As a result, the surface layer will become fragile and difficult to bond with.
Skipping the mist coat – Applying standard, undiluted paint directly to bare plaster prevents the paint from bonding. The "thirsty" wall sucks the moisture out too fast, causing the paint to peel off in sheets.
Poor surface preparation – Neglecting to sand away "nibs" or failing to remove plaster dust ensures an uneven finish, as paint cannot adhere to a dusty surface.