How To Cut Acrylic Sheets
How To Cut Acrylic Sheets


Tools Needed For Cutting Acrylic Sheets
Getting the right tools in place is essential before you start cutting. Most of the tools used for acrylic will also work when learning how to cut polycarbonate sheet, but you’ll need to adjust your technique slightly, as polycarbonate is much tougher and responds differently during cutting.
-
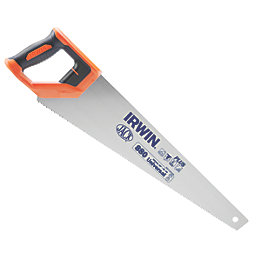
Hand Saw: Don't know how to cut acrylic sheet by hand? A fine-toothed saw works best for straight lines, offering smooth, controlled cuts while reducing the risk of chipping or cracking.
-
Scoring Knife: For smaller pieces, a scoring knife is great. Simply score the sheet along a straight edge multiple times, then snap it clearly.
-
Jigsaw: If you need to handle curves or non-straight lines, a jigsaw works well. Just ensure you use a fine blade to prevent splintering. Take it slow to avoid mistakes.
-
Circular Saw: For larger sheets, a circular saw gives a precise cut. It’s crucial to wear gloves and safety glasses from a good PPE selection to protect yourself. For more tips, explore our power saw buying guide.
-
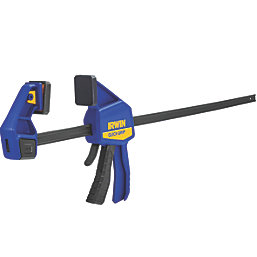
Clamps: These are essential for holding the acrylic in place while cutting, ensuring stability and accuracy.
-
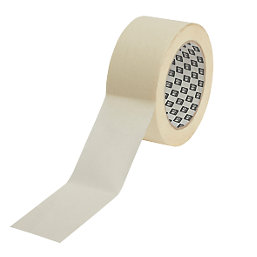
Masking Tape: Applying masking tape along the cutting line reduces the risk of cracks.
Different Methods For Cutting Acrylic
There are several ways to cut acrylic, and the right approach depends on your tools, the sheet thickness, and the finish you want to achieve. From hand tools to laser cutters, each method has its own strengths. Whether you're figuring out how to cut acrylic sheet by hand or aiming for a flawless edge, it’s important to choose the technique that suits your setup. Below, you'll find practical options that can help you cut acrylic without cracking and get results that match the needs of your project.
How to cut acrylic with a hand saw
An easy way to cut acrylics at home is by using a fine-tooth hand saw, which offers precision and control for clean, straight edges. Here’s a step-by-step guide to ensure you get it right without cracking or damaging the material.
1. Prepare Your Work Area
Set up a stable, flat surface to work on, such as a workbench. Secure the acrylic sheet using clamps; this helps achieve precise cuts.
2. Mark Your Cutting Line
Use a marker or masking tape to draw a clear line where you need to cut. This will serve as your guide, especially when you’re cutting an acrylic sheet by hand.
3. Start Sawing Slowly
Position your fine-tooth hand saw at a low angle (around 45 degrees) and begin sawing gently along the line. Steady, even strokes work best to avoid cracks.
4. Maintain Consistent Pressure
Keep the pressure light and avoid forcing the saw through. The key is a smooth motion, which prevents any mishaps like cracking.
5. Complete the Cut
Continue sawing until you’ve fully cut through the sheet. Take your time, accuracy is more important than speed. You’ve now mastered how to cut acrylic without cracking it.
Score and Break Method
The score and break method is a simple and effective way to cut thin sheets of acrylic, especially if you’re working at home and don’t have access to power tools. This technique helps you achieve a clean cut without the risk of cracking. Here’s how to cut acrylic using this method:
1. Mark the Cutting Line
Measure the sheet and mark the line where you want to cut. A ruler or straight edge helps keep the line precise, which is essential when learning how to cut acrylic sheet by hand.
2. Score the Acrylic Sheet
Using a utility knife, score along the marked line with steady, even pressure. Go over the line multiple times to create a deep groove. This step can help you prevent cracks in the acrylic during cutting.
3. Position for the Break
Place the sheet on the edge of a sturdy table with the scored line aligned to the edge. Clamp it securely to prevent slipping.
4. Snap the Acrylic
Apply firm, even pressure to the overhanging section. The sheet should break cleanly along the scored line, making this method one of the easiest ways to cut acrylic at home.
How to cut acrylic sheets using a Jigsaw
Here's how to cut acrylic sheets using jigsaws, which is great for handling thicker sheets or creating curved lines. Just follow these steps to
1. Prepare Your Workspace
Set up a stable workbench with adequate work lights. Clamp the acrylic to prevent any movement during cutting for accuracy and smooth process overall.
2. Choose the Right Jigsaw Blade
Use a fine-toothed blade specifically designed for plastics. This helps avoid chipping or cracking while cutting acrylic. Adjust the jigsaw’s speed to a lower setting for better control.
3. Mark the Cutting Line
Use a marker or masking tape to draw your cutting line on the protective film of the acrylic. A clear line ensures you cut accurately without deviating from your intended path.
4. Begin Cutting Slowly
Start cutting along the line, allowing the jigsaw blades to do the work. Maintain a steady pace and apply minimal pressure, helping you cut acrylic without cracking or melting.
5. Smooth the Edges
Once you've finished, sand down the cut edges with fine-grit sandpaper to achieve a polished finish. This step is crucial for a professional look, especially if you’ve just learned how to cut acrylic for the first time.
How to cut acrylic with a circular saw
Using a circular saw requires a great level of carefulness and preciseness to avoid cracking. Here’s a simplified guide to help you:
1. Prepare your Workspace
First, make sure you have a clean, level surface to work. Use clamps to secure the acrylic sheet to prevent movement.
2. Choose the Right Blade
Select a fine-toothed blade specifically designed for cutting plastics. The correct blade helps avoid rough edges, ensuring a clean cut. Attach this to your circular saw and adjust the depth to match the thickness of the acrylic.
3. Mark the Cutting Line
Use a marker or masking tape to outline your cutting path on the protective film of the acrylic. This ensures accuracy, especially when cutting at home.
4. Start Cutting Slowly
Turn on the saw and let it reach full speed before bringing it into contact with the sheet. Gently guide the circular saw along the marked line, maintaining a consistent speed to prevent the acrylic from chipping or cracking.
5. Finish and Smooth the Edges
Once you’ve cut through the sheet, sand down the edges with fine-grit sandpaper for a smooth finish.
Laser cutting acrylic
Laser cutting is one of the most precise ways to cut acrylic, especially when you’re aiming for intricate shapes and designs. Unlike using a jigsaw or hand saw, a laser cutter offers unparalleled accuracy, allowing you to achieve complex cuts without the risk of rough edges or cracks. This method is ideal when working with thicker sheets or if you want a clean, polished finish straight away.
It’s not the typical option for those wondering how to cut acrylic at home since it requires specialised equipment, but many professionals and enthusiasts use laser cutting for projects that demand precision. The heat from the laser smoothly melts through the acrylic, eliminating any chance of cracking, which can be a concern with other methods.
If you're working on detailed projects or need to create multiple pieces with consistent accuracy, laser cutting is unmatched. This method offers a flawless finish, making it a top choice for many DIY enthusiasts and professionals who want to elevate their work's quality.
How To Finish Acrylic Edges
Learning how to cut acrylic is not over until you’ve gotten the hang of the finishing stage. Finishing acrylic edges is essential for a polished, professional look, especially after you’ve learned how to cut acrylic accurately. Once you’ve made your cuts, whether you chose to cut acrylic at home or in a workshop, the edges can often be rough or uneven. Here are the two major steps you need to achieve that smooth, glass-like finish.
Start with sanding. Using a coarse grit sandpaper, like 120 grit, gently sand the edges in one direction to remove any bumps or jagged parts. Gradually switch to finer grits, such as 240 grit and then 400 grit, for a smoother surface. You might find sanding blocks or electric sanders handy for larger pieces.
Next, it’s time for polishing. For a professional finish, use a polishing compound or acrylic polish with a clean cloth, buffing in circular motions until the edge becomes clear. Alternatively, a polishing wheel attached to a drill can speed up the process. This method ensures your acrylic looks fantastic, whether you cut a acrylic sheet by hand or use a power tool.
Safety Considerations When Cutting Acrylic
When handling acrylics, safety should always be your top priority. Whether you’re cutting acrylic at home or tackling a larger project, keep the following safety tips in mind:
-
Wear Safety Glasses and Gloves: Acrylics can produce small, sharp fragments when cut, which could pose a danger. Always protect your eyes and hands with proper PPE.
-
Work in a Well-Ventilated Area: Cutting acrylic, especially at home, can release fine dust particles. Ensure there’s plenty of airflow to avoid inhaling these particles.
-
Keep Your Workspace Free of Debris: Clear away any debris frequently to prevent accidents and maintain precision while cutting. This is particularly important when learning how to cut acrylic without cracking.
-
Use the Right Tools: When figuring out how to cut an acrylic sheet by hand, choose a fine-toothed saw or a scoring tool for cleaner edges.
-
Take Your Time: Rushing can lead to mistakes, so cut slowly and steadily to avoid cracks, ensuring safety throughout the process.
Common Mistakes To Avoid When Cutting Acrylic
-
Using the wrong saw: When cutting acrylics at home, always choose a fine-toothed saw or a scoring tool. A coarse saw can lead to cracks or uneven edges, making your project look less polished.
-
Not securing the sheet properly: If the acrylic sheet isn’t firmly clamped, it might shift while cutting. This not only results in imprecise cuts but could also cause the sheet to crack, especially when learning how to cut acrylic without cracking.
-
Cutting too quickly: Rushing the process often leads to mistakes or unwanted cracks. Take your time, particularly when cutting acrylic sheets by hand, to achieve a smooth, clean edge.
-
Skipping safety gear: Always wear protective gloves and glasses. It’s easy to overlook safety, but acrylic fragments can be sharp and dangerous.
-
Assuming acrylic and polycarbonate can be cut the same way: If you're learning how to cut polycarbonate sheet, don’t assume the same tools or techniques will work. Polycarbonate is tougher and may need slower cutting speeds or specialised blades to avoid damage.
How To Cut Acrylic Sheets In Summary
Cutting acrylic sheets isn’t as tricky as it might seem. With the right tools and a bit of patience, you can achieve a clean, smooth cut every time. Whether you’re learning how to cut acrylic without cracking or just trying to improve your technique when cutting acrylic sheet by hand, the key is to take it slow and steady. Always secure your sheet and choose the right tools as it makes a great difference.
Acrylic is a brilliant choice for many home projects, but if you need something stronger, polycarbonate might be the better fit. Just make sure you know how to cut polycarbonate glazing sheets safely to avoid cracks or splintering.